June/July 2019 Trip Report: Day 6-8 Jasper National Park (Alberta, Canada)

BANFF VS. JASPER

So, you’re planning a trip to Banff. Should you make it up to Jasper, too? I think an extra day or so to visit Jasper is worth it. We were there for 3 full days, and drove back from Jasper to Calgary on the 4th day. It rained most of the time we were in Jasper, so we spent one day really just hanging out and enjoying the expensive but beautiful log cabin we rented.

Jasper is further north of Banff (about a 4 hour drive from Calgary, 2-3 hours from Banff depending on if you stop along the way or drive straight through). Compared to Banff, Jasper is much more rugged and wild. We spotted animals every day (bears, elk, moose) and the town is more community-like and spread out, rather than touristy, concentrated, and compact the way Banff is. In terms of highlights, I like Banff much more in terms of things to see and the gorgeous lakes and landscape. Jasper was pretty as well, but different. And because of the weather and plethora of more rugged trails, we didn’t do as much. I thought Banff had more concentration of accessible beauty compared to Jasper.

In my opinion, the main thing to see in Jasper was going up the Jasper Gondola to hike up to the summit above the clouds and going down to Maligne Lake. Apparently, there are bears that love to walk around the road that leads you into Maligne Lake! So if you have an extra day or two, it’s worth stopping by Jasper.

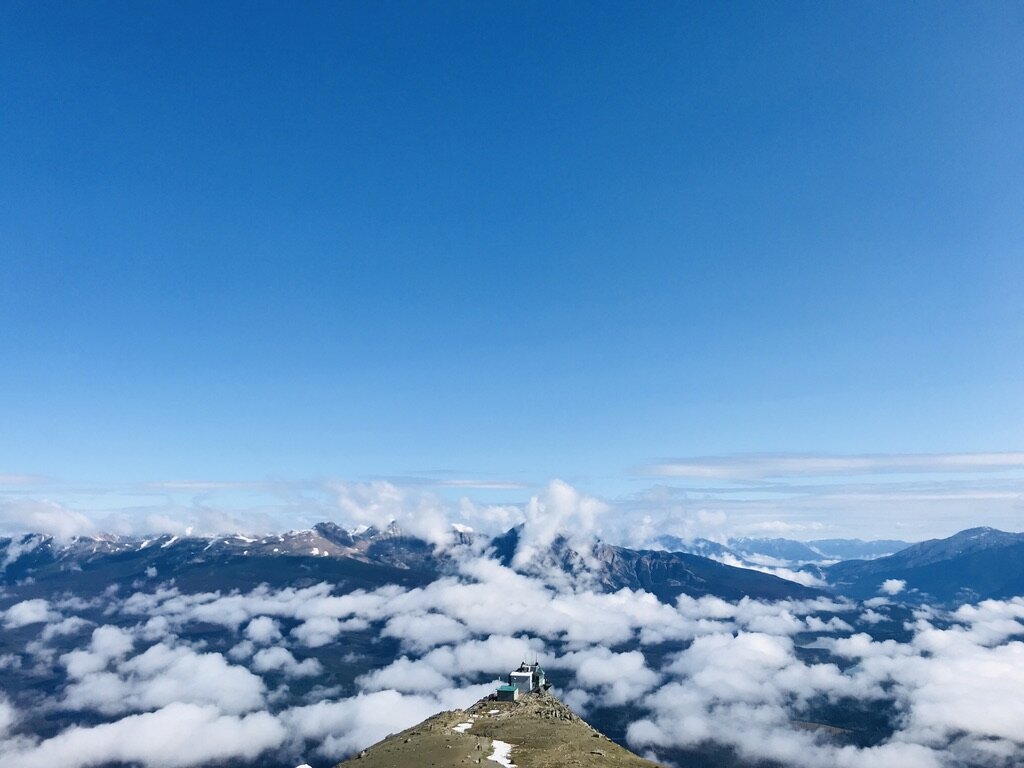
Above the clouds in Jasper National Park

Above the clouds in Jasper National Park

JASPER SKYTRAM

Jasper Skytram is so worth going on! On the morning we went, it was really overcast and cloudy so I was doubtful we would enjoy it at all. When we arrived very early in the morning to get on the gondola (around 8:15 am), the operator said we didn’t have to worry because it was clear at the top above the clouds. If you plan to do this, come as early as you can in the morning! By the time we left/went back down around 12:15 pm, the line to go up was packed. But another plus of coming early when it opens at 8 am is that you get free breakfast included at the restaurant at the top! Free breakfast is served before 10 am.

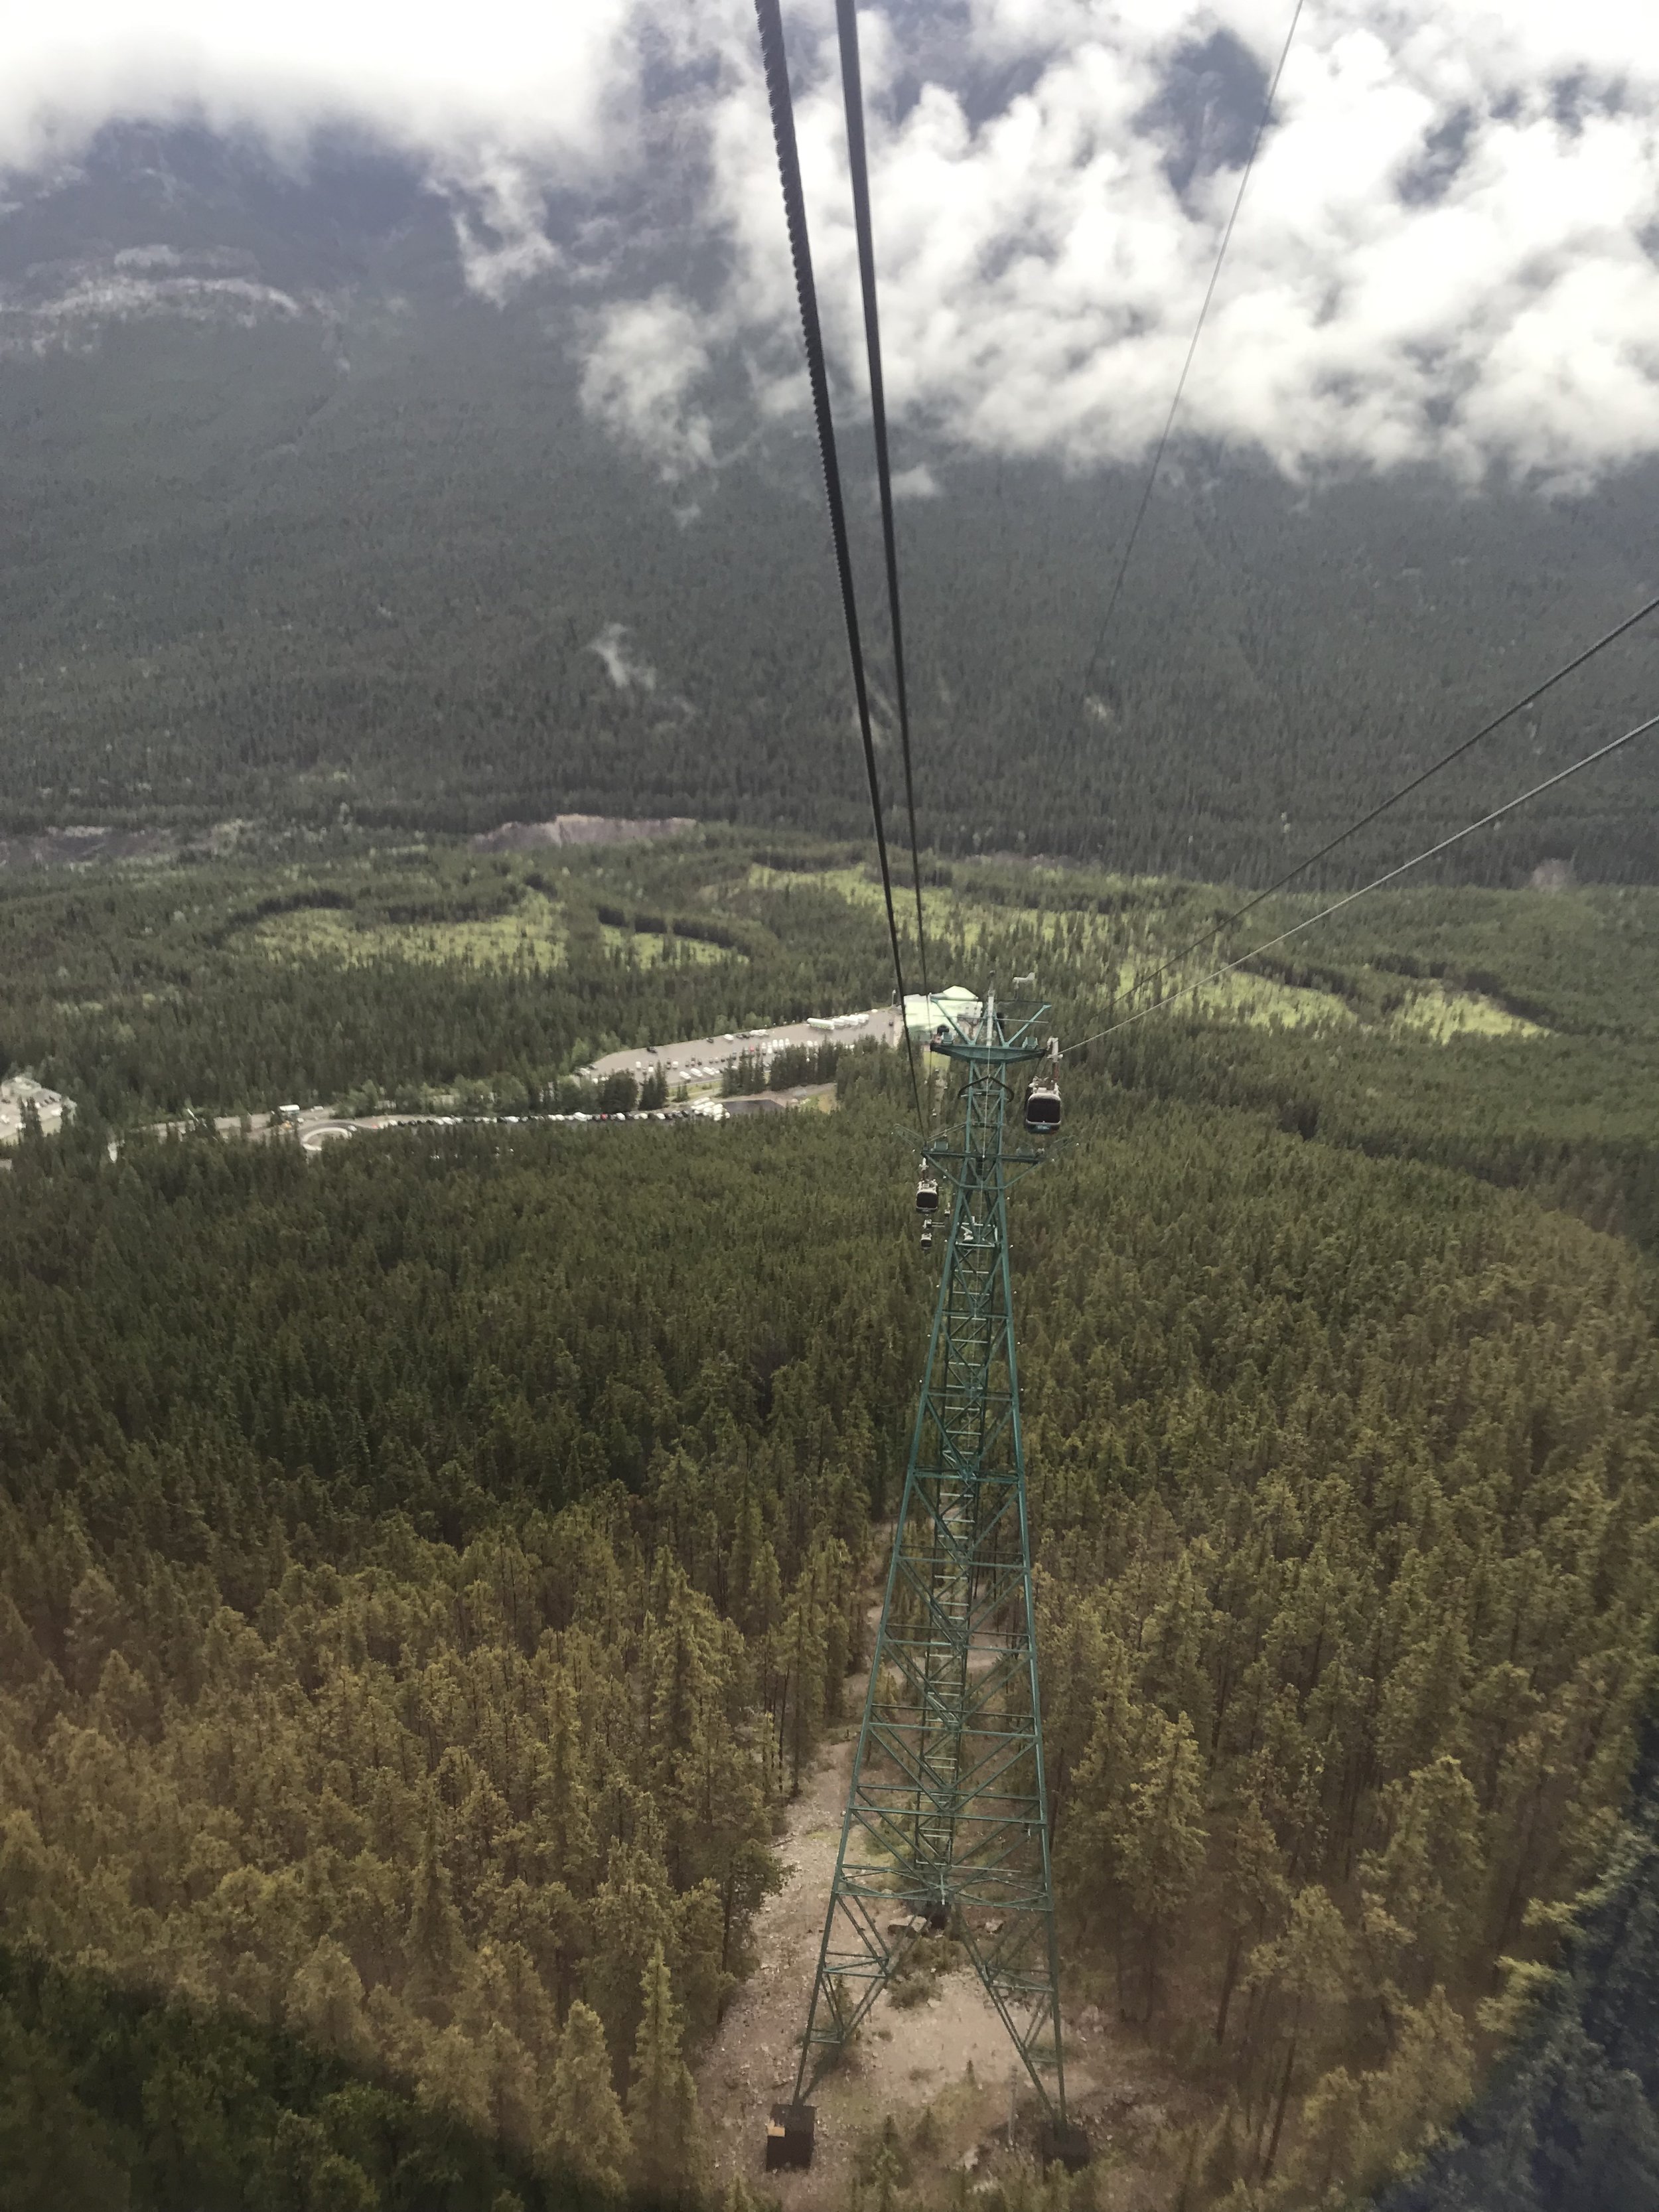
Tram up and through the clouds

Tram up and through the clouds

Toasty hot chocolate for breakfast with a glorious view.

Toasty hot chocolate for breakfast with a glorious view.

Breakfast was actually quite good and it came with a complimentary drink as well and glorious views. After finishing breakfast, we started the hike to the summit at 9:30 am and didn’t reach the top until 11 am. The path was pretty steep and the altitude is high so you’ll want to take your time. It’s not impossible to do at all, but not easy either. And there are multiple paths you can take to the top to see different viewpoints and overlooks.

On the way to the summit!

On the way to the summit!

As the morning went on, the clouds cleared up to reveal the town below.

As the morning went on, the clouds cleared up to reveal the town below.

View of Jasper further up the mountain

View of Jasper further up the mountain

One of several benches on the mountain to take in the landscape

One of several benches on the mountain to take in the landscape

No more clouds!

No more clouds!

Summit View

Summit View

Panoramic views - it is colder at the top so dress accordingly!

Panoramic views - it is colder at the top so dress accordingly!

I really loved hiking up this summit. It took us about 30 minutes to get back down and as I said earlier, the mountain got much busier as the morning drifted away.

MALIGNE LAKE

After a quick lunch in town, we left at 1:30 pm to catch the “premium” Maligne Lake Cruise. There are two cruise choices, one regular, and one premium. The premium basically allows you to walk onto Spirit Island for about 30 minutes, which is more than enough as the area you’re around to walk on is very small and short! You’re only allowed to walk within the outskirts of the island, in one direction. This is a constructed path to protect the island respect the natives who worship its history. This lake cruise was much better than the one we did in Banff (Minnewaska), but also skippable as well if you’re short on time.

Views from Spirit Island (you can walk it in 15 minutes!)

Views from Spirit Island (you can walk it in 15 minutes!)

Maligne Lake

Maligne Lake

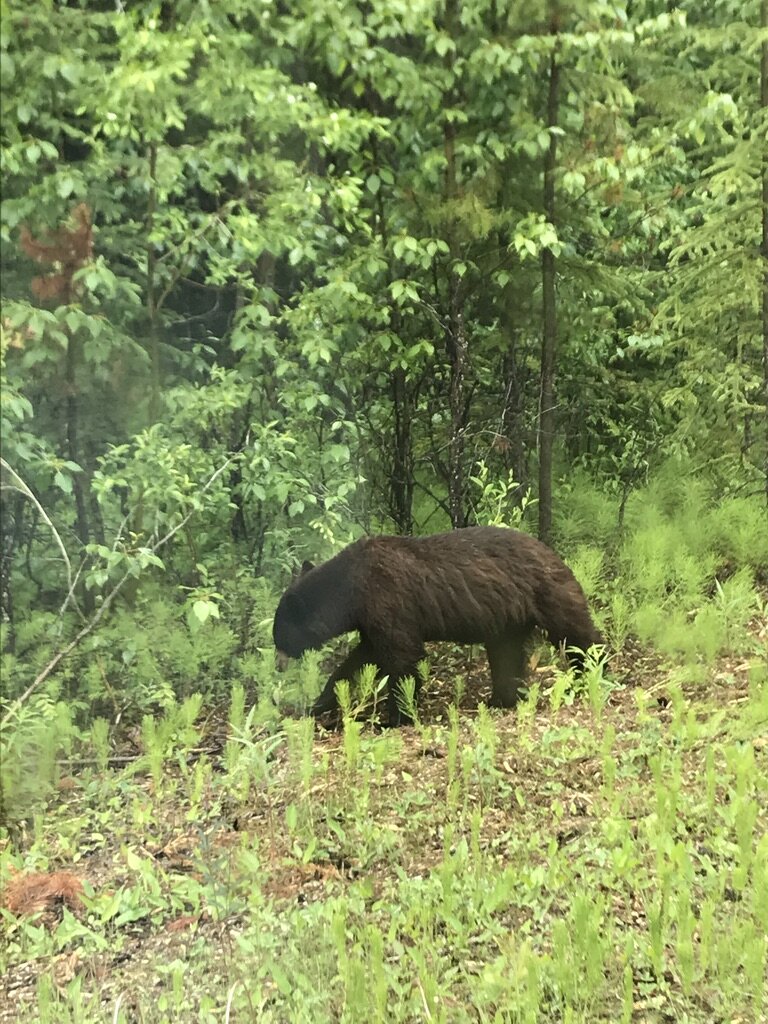
You will definitely see bears driving back and forth from Maligne Lake! We drove on this road multiple times and we always saw a bear or two (from the safety of the car, please don’t get out like we saw multiple dumb people do!) over the course of three days.

UNADJUSTEDNONRAW_thumb_11b3.jpg

MALIGNE CANYON

Another thing to do in Jasper is go for a walk/hike along Maligne Canyon. This was nice to see and something to do but not a must do. Twenty minutes was enough to see views of the canyon from the first and second bridges. I think there are like 6 bridges but I read somewhere that the best views were from the first two. So if you’re short on time, just do that, but if you have more time, you can do all of it. The first bridge starts by the restaurant near the parking lot and then it loops to the second bridge.

Misc. Jasper Notes

  • Pyramid Lake is skippable. If you have time, you can drive and have a look but compared to all the other amazing lakes in Banff, Pyramid was just ok!

  • Valley of the the Five Lakes was also skippable. It’s rugged trails and again, compared to other things to see/do in Banff, wasn’t as interesting to us. I hiked for about 30-45 minutes and never even made it to see a lake because of the rain, muddy trails, and generally didn’t look as interesting as to the other scenery we saw earlier in the trip.

  • Medicine Lake is an easy viewpoint to stop and take pictures at, but also skippable compared to Lake Louise or Moraine Lake

Overall, although we didn’t do much in Jasper as we did in Banff, it was nice to kick back, relax, and just chill in the cabin most of the time and cook. Since all the other days were so jam packed with sight seeing, it was nice to slow down and just do whatever we wanted and not rush around as much to beat the crowds. We also saw way more animals in the wild in Jasper than in Banff which was cool. The weather when we were there at the end of June/beginning of July was on the chillier side (like ranging from 40s to 60s in Fahrenheit) but I heard the year before it was much warmer, and I think two weeks after we left, it was really hot and there were wildfires! I’m glad it was chilly though because we hardly had any bugs/mosquitoes (heard that they’re humongous in Lake Louise). I did see a few monster mosquitoes but definitely not as many had it been warmer.

A visit to both parks is worth all the planning though! I feel very spoiled after visiting the beauty of Banff, Jasper, and Patagonia (in South America) over the past 12 months, I am not sure if I’ll ever find any other parks as appealing for a long while (especially those close to where I live in NYC!). I do want to go to Yosemite and Zion National Parks someday and open to suggestions and comments to any other places I should check out in the future! :)
June/July 2019 Trip Report: Day 5 of Banff National Park (Alberta, Canada)

The morning of Day 5 of our trip was spent on the last segment of our Ultimate Explorer Banff tour. We booked an 11 am tour for the Columbia Icefield Adventure & Skywalk visit, but arrived to the parking lot by 10:20 am. It’s about a 2 hour drive from Lake Louise.

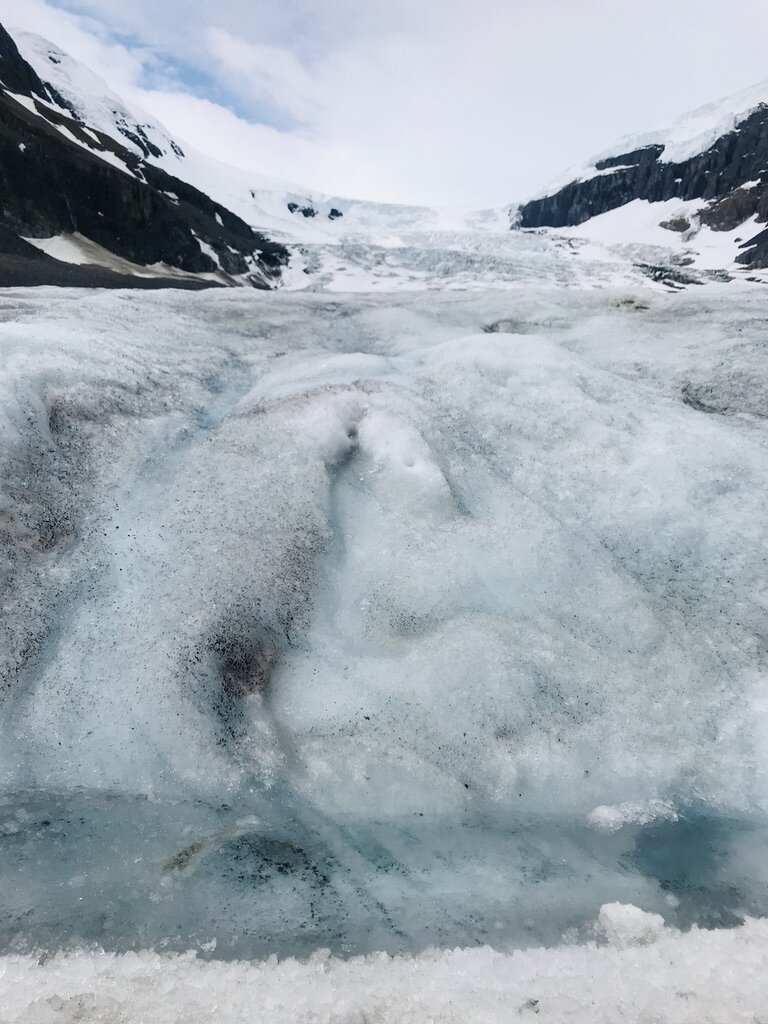
If you have never seen a glacier before, this is worth doing. If you have, you could probably skip it though! The Skywalk is part of the tour as well, and you do this after visiting the glacier. The cool part of the tour is riding the big icefield trucks out to the glaciers—there are like 12 in the world and 9 of them are on this tour while the others are used around the world for scientific reasons. The entire tour lasts about 2.5 hours. The walk on the glacier itself is about 30 min. long (which is more than enough as the space for walking isn’t that big).

Columbia Icefield Glacier

Columbia Icefield Glacier

EK5kbc29RZustYyxOHDVWw_thumb_104b.jpg

For the Skywalk part, you can stay as long as you’d like and then take one of the many buses that circle around back. We finished the tour close to 1:30 pm and had lunch there at the Visitor Center since there is nothing else around but the food was decent (but pricey). The Skywalk was ok, I thought it would be more exciting since the floor is see-through glass but it’s also really thick and not as scary as you think since you can see your reflection and things like that, obscuring the true view.

View of the valley from Skywalk

View of the valley from Skywalk

fraaX4ZzR9uMWLwR9TDJaw_thumb_1060.jpg

As we were driving up to Jasper National Park, we stopped along a couple of other stops along the way but the weather was crappy (rainy) so we didn’t stay very long.

After leaving the Columbia Icefield Visitors Center at 2:30 pm we went to Sunwapta Falls, arriving at about 3:20 pm. It wasn’t that impressive as the others so this is skippable unless you want to kill some time!

Then we headed to Athabaska Falls, arriving at 3:45 pm but due to the rain, we didn’t stay long here either and left to check into the cutest log cabin in all the land, Alpine Village Jasper. We stayed in the Whistler One Bedroom Cabin, and it was expensive but SO worth it! Built in 2018, these cabins still felt so spanking new and was so cozy and comfortable to stay in. I loved it and would definitely stay here again! It had a full kitchen and it was nice to cook our own meals and have a cup of tea out on the patio. The entire area reminds me of being in a Disney fairy tale village. It’s about a ten minute drive into Jasper but it was so lovely to stay here out in nature with modern amenities. I’m also glad we stayed here because for the most part, it was raining most of our time in Jasper so to have a nice place to chill and relax indoors was quite nice. This place also has an outdoor hot tub (by reception) but we didn’t use it.

UNADJUSTEDNONRAW_thumb_1081.jpg

June/July 2019 Trip Report: Day 3 of Banff National Park (Alberta, Canada)

LAKE LOUISE

pu20EPHOQtGrVT%EOY%dVQ_thumb_ec4.jpg

Lake Louise is a highlight of Banff National Park. We planned to spend two nights at Lake Louise, which I highly recommend so that you can see everything you want in this area (Lake Louise, Moraine Lake, nearby Yoho National Park). We left Banff downtown at 8 am and an hour later, arrived and there was already traffic getting to the lake! It is no joke to come here ASAP in order to get prime parking. Otherwise, you need to park further away and shuttle over. We were lucky and were able to park in a lot close to the Fairmont Lake Louise hotel.

As a quick summary, this was what we did on Day 3 of the trip at Lake Louise:

  • Hike to Fairmont Lookout

  • Perimeter walk around Lake Louise by the hotel (FYI the hotel seemed more strict than the one in Banff in terms of access; the public can use it if they plan to shop/eat there though)

  • Attempted to visit Bow Glacier Falls

  • Visited Peyto Lake

  • Visited Mistaya Canyon

Day 3

We did the hike up to the Fairmont Lookout. It was a bit steep, but not terrible. Definitely knew there were animals in the area due to ‘evidence’ on the trails (meaning animal droppings, lol) but it felt safe. It’s about a mile and change one way up. When the trail flattens out and dips down a bit, you know you’re near the end of the hike and you’ll see a platform which allows you to see the lake in all its turquoise blue glory with the hotel in the back. The platform has a bench and a snack is recommended if you don’t have time for breakfast in the morning! It took us about 45 minutes to get to the top, starting at 9:45 am and we were back down by 11 am.

I also had the Lake Agnes Teahouse on my list as a possible trail to do but we ended up skipping it due to our later morning start (seriously, need to get here at like 6 am if you want to do this in peace without the hordes of tourists!). They actually ended up closing it that day too due to a nearby bear sighting! I’ve heard the teahouse hike is also long and steep so didn’t mind skipping it.

From 11 am - noon, we walked around the perimeter of Lake Louise which was gorgeous. It’s still so incredible to me that there are SO many people who come here to photograph it, yet it’s still possible to take a picture as if there is no one else here (definitely was not the case!).

Me & Lake Louise

Me & Lake Louise

For lunch, we had amazing sandwiches from this casual take out place at the nearby shopping center called Trailhead Cafe. The food was fresh, big portions, and so good we came back the next day to eat again!

The downtown area of Lake Louise is very small and you should definitely book a hotel way in advance as soon as you know you want to come here! I was very lucky to find room at Mountaineer Lodge back in January when I was looking. Initially almost all moderately priced rooms were sold out, but the lodge just renovated and released rooms back when I booked it. It’s going to be expensive in Banff/Jasper no matter what and I TOTALLY think it’s worth spending the money staying in the areas you want to stay in to limit all the driving back and forth. I’m so glad we stayed here due to it’s super close proximity to Lake Louise and Moraine Lake, both of which are overloaded with tourists. Anyway, Mountaineer Lodge was great, very stylish and comfortable and they also have an indoor hot tub. Actually all the places we stayed at had a hot tub but we never had a chance to use them! They also include free breakfast, which was great. Another word of advice though: do your supermarket shopping in Banff before coming to Lake Louise! Their supermarket options were more expensive and tiny compared to Banff’s.

Another tip: If you need to use the restroom but can’t find a good public one, just head over to Lake Louise Gondola. This is a ski resort with another chairlift to the top of the mountain. It’s less than a 10 minute drive from downtown Lake Louise. We contemplated taking the gondola up, but the weather was cloudy and you can see the sky cam from the top broadcasted next to the ticket desk to determine if you feel like it’s worth going to or not. To us, it wasn’t so we skipped it and headed over to Bow Glacier Falls.

Bow Lake

So we never really made it to Bow Glacier Falls. I wanted to, but it’s considered bear territory and it wasn’t swarming with tourists like other trails were so didn’t feel comfortable going without any defense. However, the lake around here was GORGEOUS and reminded me very much of the mountains and lakes I saw in Patagonia! It’s great to just walk around the perimeter towards the Bow Glacier Falls trail. There is a path and you can walk as far as you want. It was also very windy here though on the day we came. We arrived here at 1:45 pm and left about an hour later.

Bow Lake

Bow Lake

PEYTO LAKE

YES THE COLOR IS FOR REAL CYAN BLUE!

YES THE COLOR IS FOR REAL CYAN BLUE!

Peyto Lake is about 15 minutes drive north of Bow Lake and SOOO worth pulling over to see! Not much of a hike here, you go straight to the platforms overlooking this beautiful cyan blue lake. I don’t think I’ve ever seen such a purely bright hued lake like this before.

MISTAYA CANYON

After the brief stop at Peyto, we then drove 30 min. north to Mistaya Canyon. The hike down to the canyon is less than a mile roundtrip and an easy walk but a semi-rocky trail. Canyon was cool to see but skippable if you don’t have the time for it. Also the fact I’m too lazy to find a picture of it to upload reminds me it was skippable, lol.

MORAINE LAKE - In the evening

By the time we returned back to the hotel and took a bit of a break, it was almost 6 pm. We decided to try our luck to get into Moraine Lake since traffic seemed to have lightened up. From Mountaineer Lodge, Moraine Lake was actually a bit closer to drive to than Lake Louise. We arrived at 6:30 pm to the parking lot and waited about 10 minutes before being able to park. But we were lucky! Pretty sure everyone after us had the same idea to come later in the day and the line to get into the park (by the time we left at 7 pm) was longer than when we came in. The problem though is that the parking lot is one way and circular, and people can’t see there are spots on the other side unless they risk going down that one way route and around towards the exit.

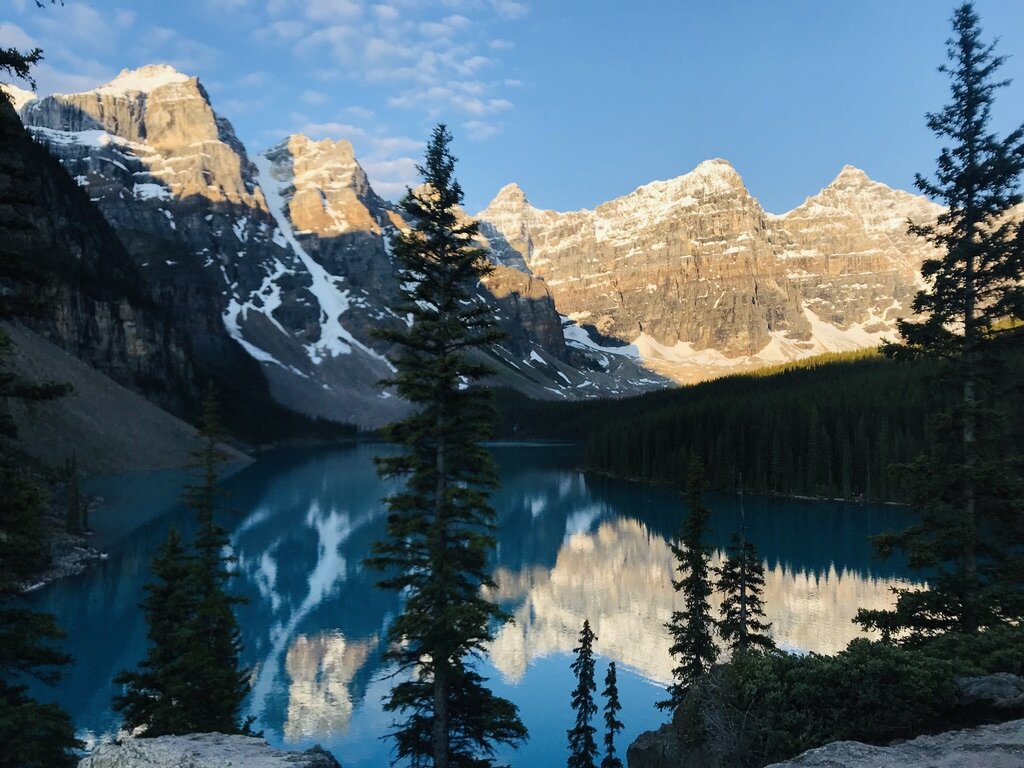
Anyway, getting a glimpse of Moraine Lake was pretty, but I didn’t get the hype. Why did everyone rave about this place? When we entered, I saw a ton of people to the left on a pile of rocks on a hill, but by then we were SO tired and I didn’t want to do another hike to see the lake from above. Also, in order to get up to the left side, it looked like you had to take this long path up and around. So we kept to the right side of the lake, which was also nice. I learned my lesson the next day though when I came back to see it at sunrise!

UNADJUSTEDNONRAW_thumb_f56.jpg
UNADJUSTEDNONRAW_thumb_f78.jpg

For dinner, we went to Peyto Cafe. The food was decent, just had burgers and fish and chips. We ate here twice as well since otherwise dining options were a bit limited in Lake Louise! It’s located inside a hostel but the service and ambience was very nice and laid back. Would recommend for an easy, relaxing dinner.

June/July 2019 Trip Report: Day 2 of Banff National Park (Alberta, Canada)

I realize I am super behind in writing about my Banff/Jasper trip! After my last post, the WiFi service was really spotty and the summer flew by in a snap. Was too busy living it then sit at home and write content! Good thing I kept meticulous notes on my iPhone during the trip though :)

DAY 2: Banff

The schedule on this day, which I mapped out in advance and we kept for the most part, was as follows:

  • Morning, 6-9 am : Visit Johnson Canyon

  • 9-10 am: Drive back to Banff town and grab quick breakfast

  • 10-10:45 am: Drive to Sunshine Village to take the gondola up

  • 11:30 am - 1 pm: Hike at the top around Sunshine Meadows

  • 3-4 pm: Returned to Banff, grab lunch and rest at hotel.

  • 4 pm: Leave to drive to Lake Minnewasaka

  • 5-6 pm: Lake Cruise

  • 6-7 pm: Drive over to Tunnel Mt. just to have a look

  • 7-8 pm: Check out Fairmont Banff but also end up at Bow Falls

  • After 8 pm: Dinner and sleep

So we crammed A LOT in on the second day, see below for notes and observations.

Morning light in the town of Banff

Morning light in the town of Banff

Johnson Canyon

Our second day in Banff started off with waking up before the crack of dawn to beat the crowd at Johnson Canyon. Very happy we made this effort as by the time we left, we noticed a plethora of more people and it wouldn’t have been as relaxing or nice since the pathways are a bit narrow.

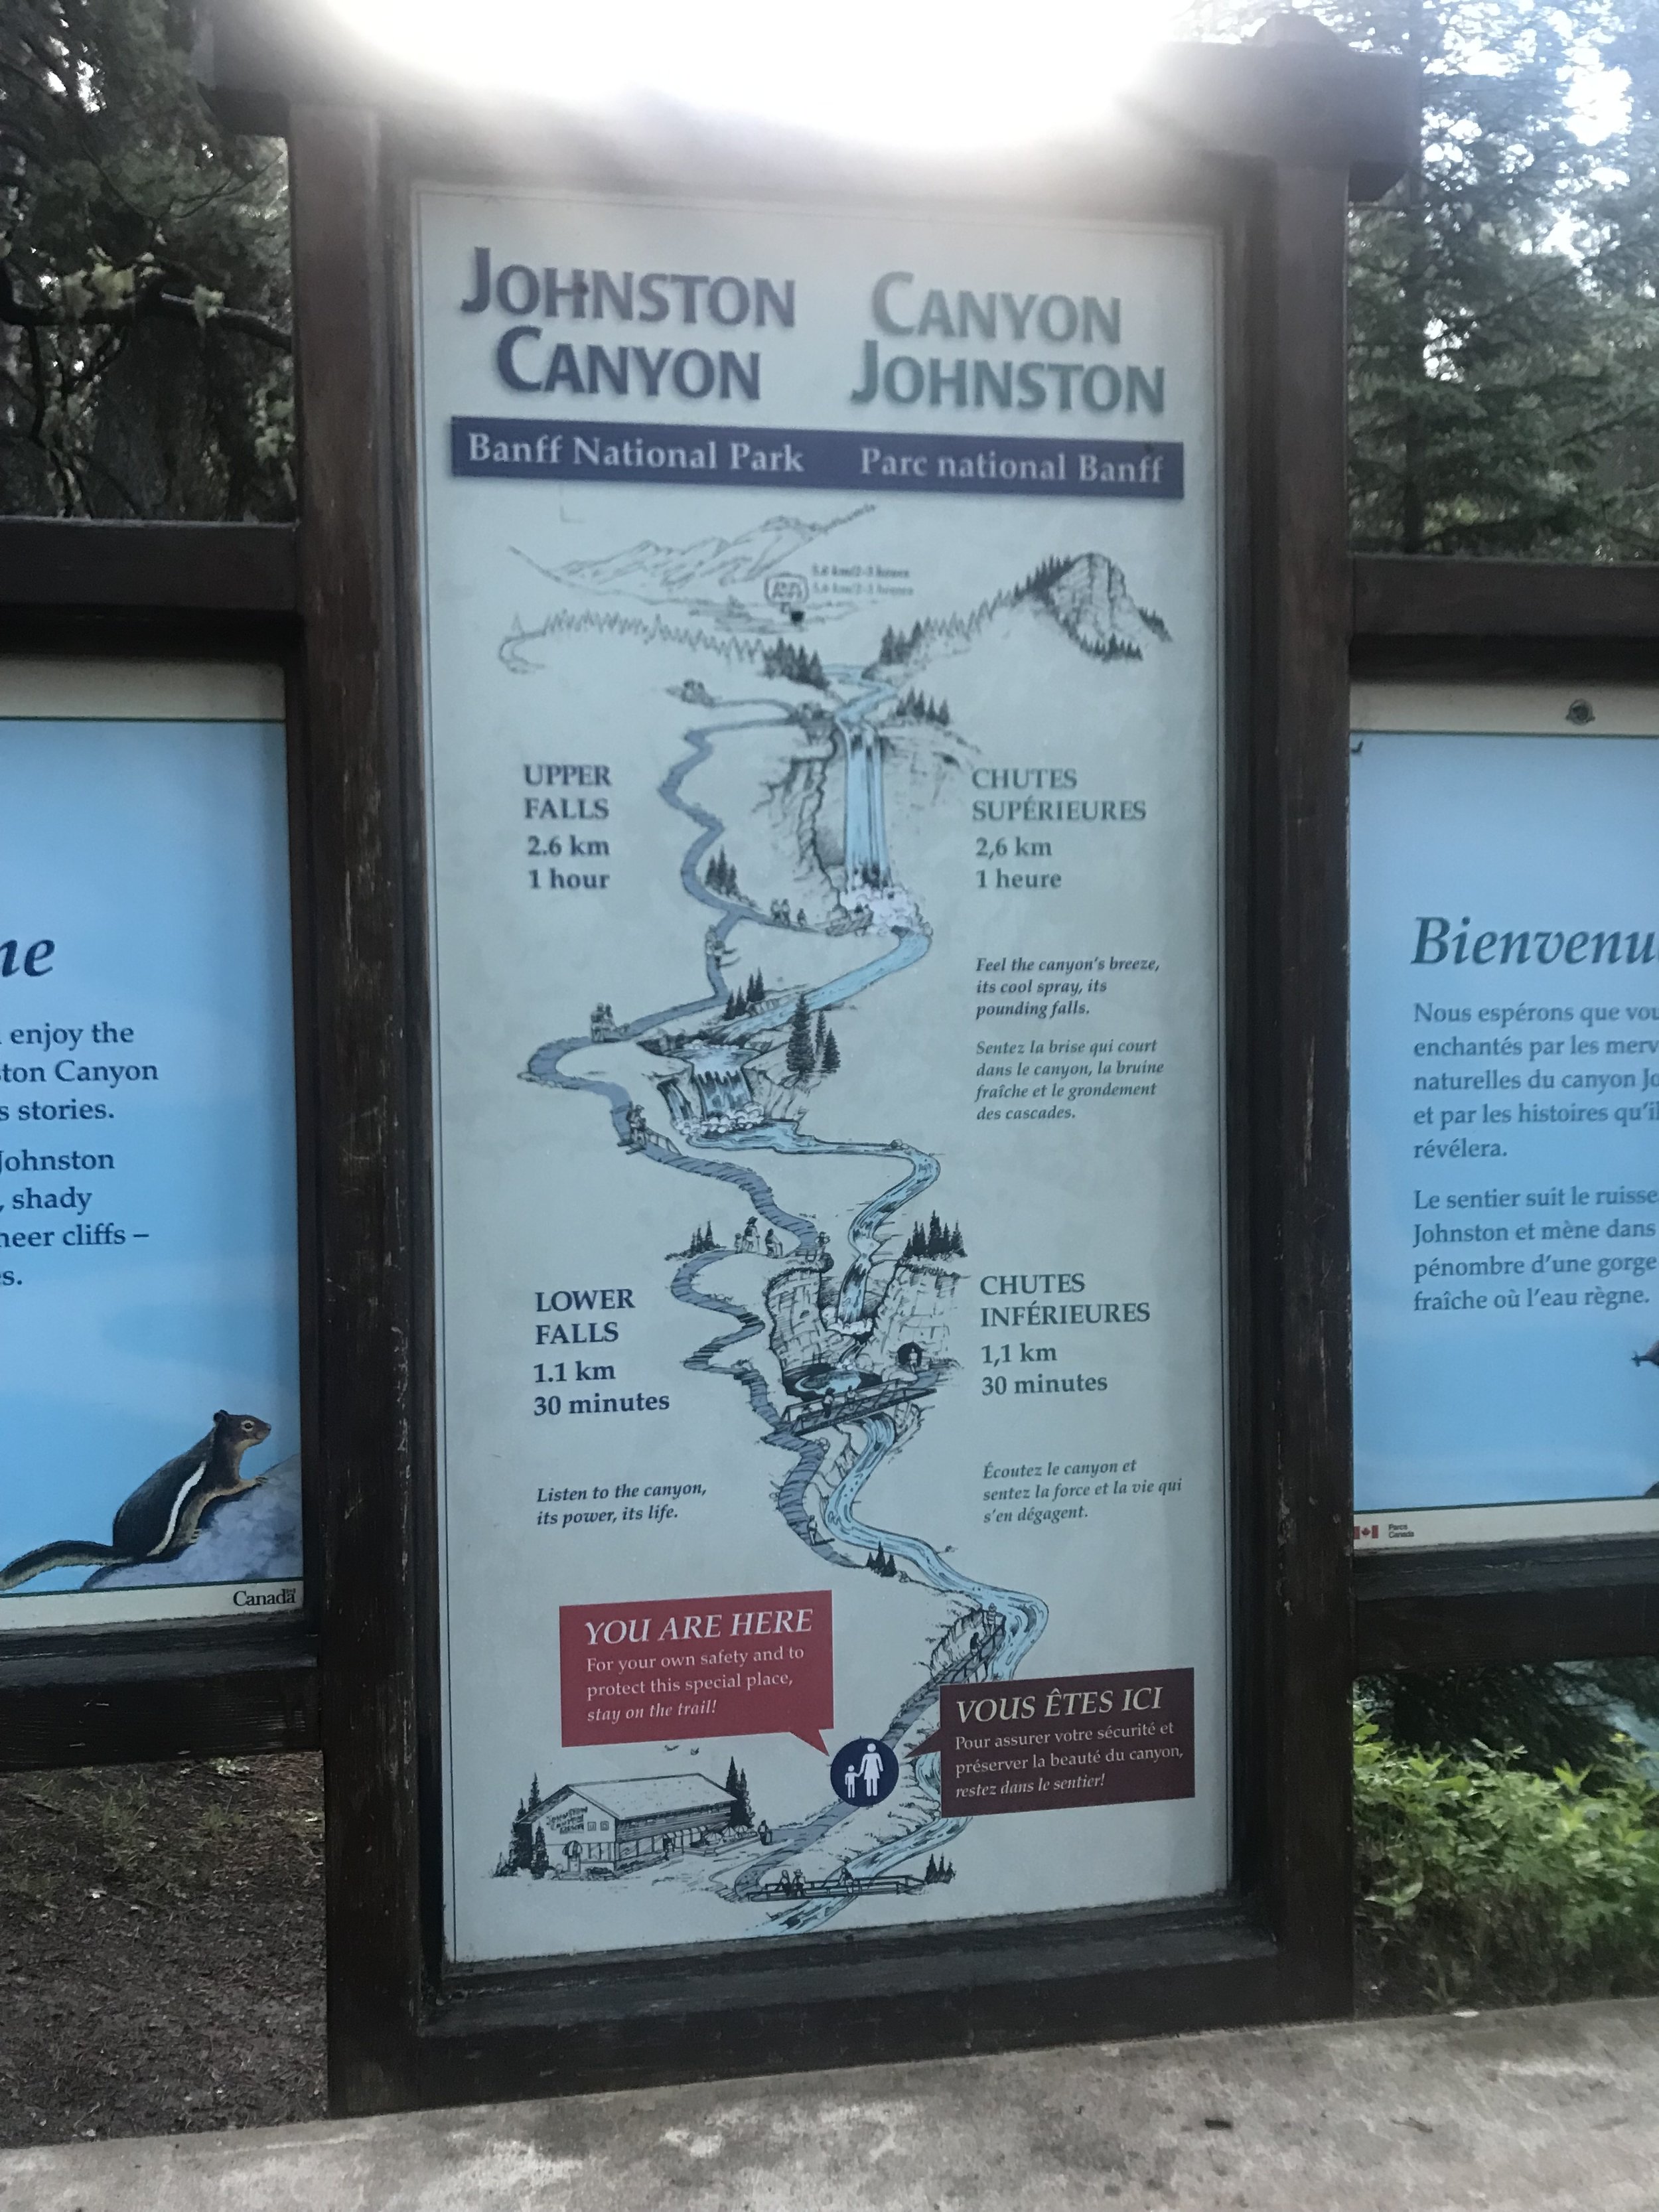
We left the hotel (Mount Royal) at 6 am to get to the canyon, which was about 45 minutes away from town. Upon arrival, there was plenty of parking but was completely full by the time we returned to the lot at 9 am. There are clean bathroom facilities here next to the parking lot. As you can see from the map below, it should take about 30 minutes to walk to the Lower Falls and from there, another hour to the Upper Halls.

IMG_3446.JPG

The trail is easy to follow. Most of the walk to the Lower Falls will be right along the canyon on these ramps. It’s pretty scenic, cool, and a bit misty down here. The walkway is a bit narrow (can fit two people comfortably side by side but probably not much more than that) which is why starting the trail early with the mass amounts of tourists is well worth it.

Upper Falls

Upper Falls

We made the (not fatal) mistake of bypassing stopping at the Lower Falls first and went straight to the Upper Falls. The walk to the Upper Falls is longer and more inland, not along the canyon. The path isn’t too difficult, but it is longer and has more ups/downs than the Lower Falls trail. Once you get near the end path to the bottom of the Upper Falls, you can take another path upwards to the top for an overlook of the Upper Falls. We skipped that portion since we were tired and had a busy itinerary for the day. If you plan to go further up, plan for another 30-45 minutes.

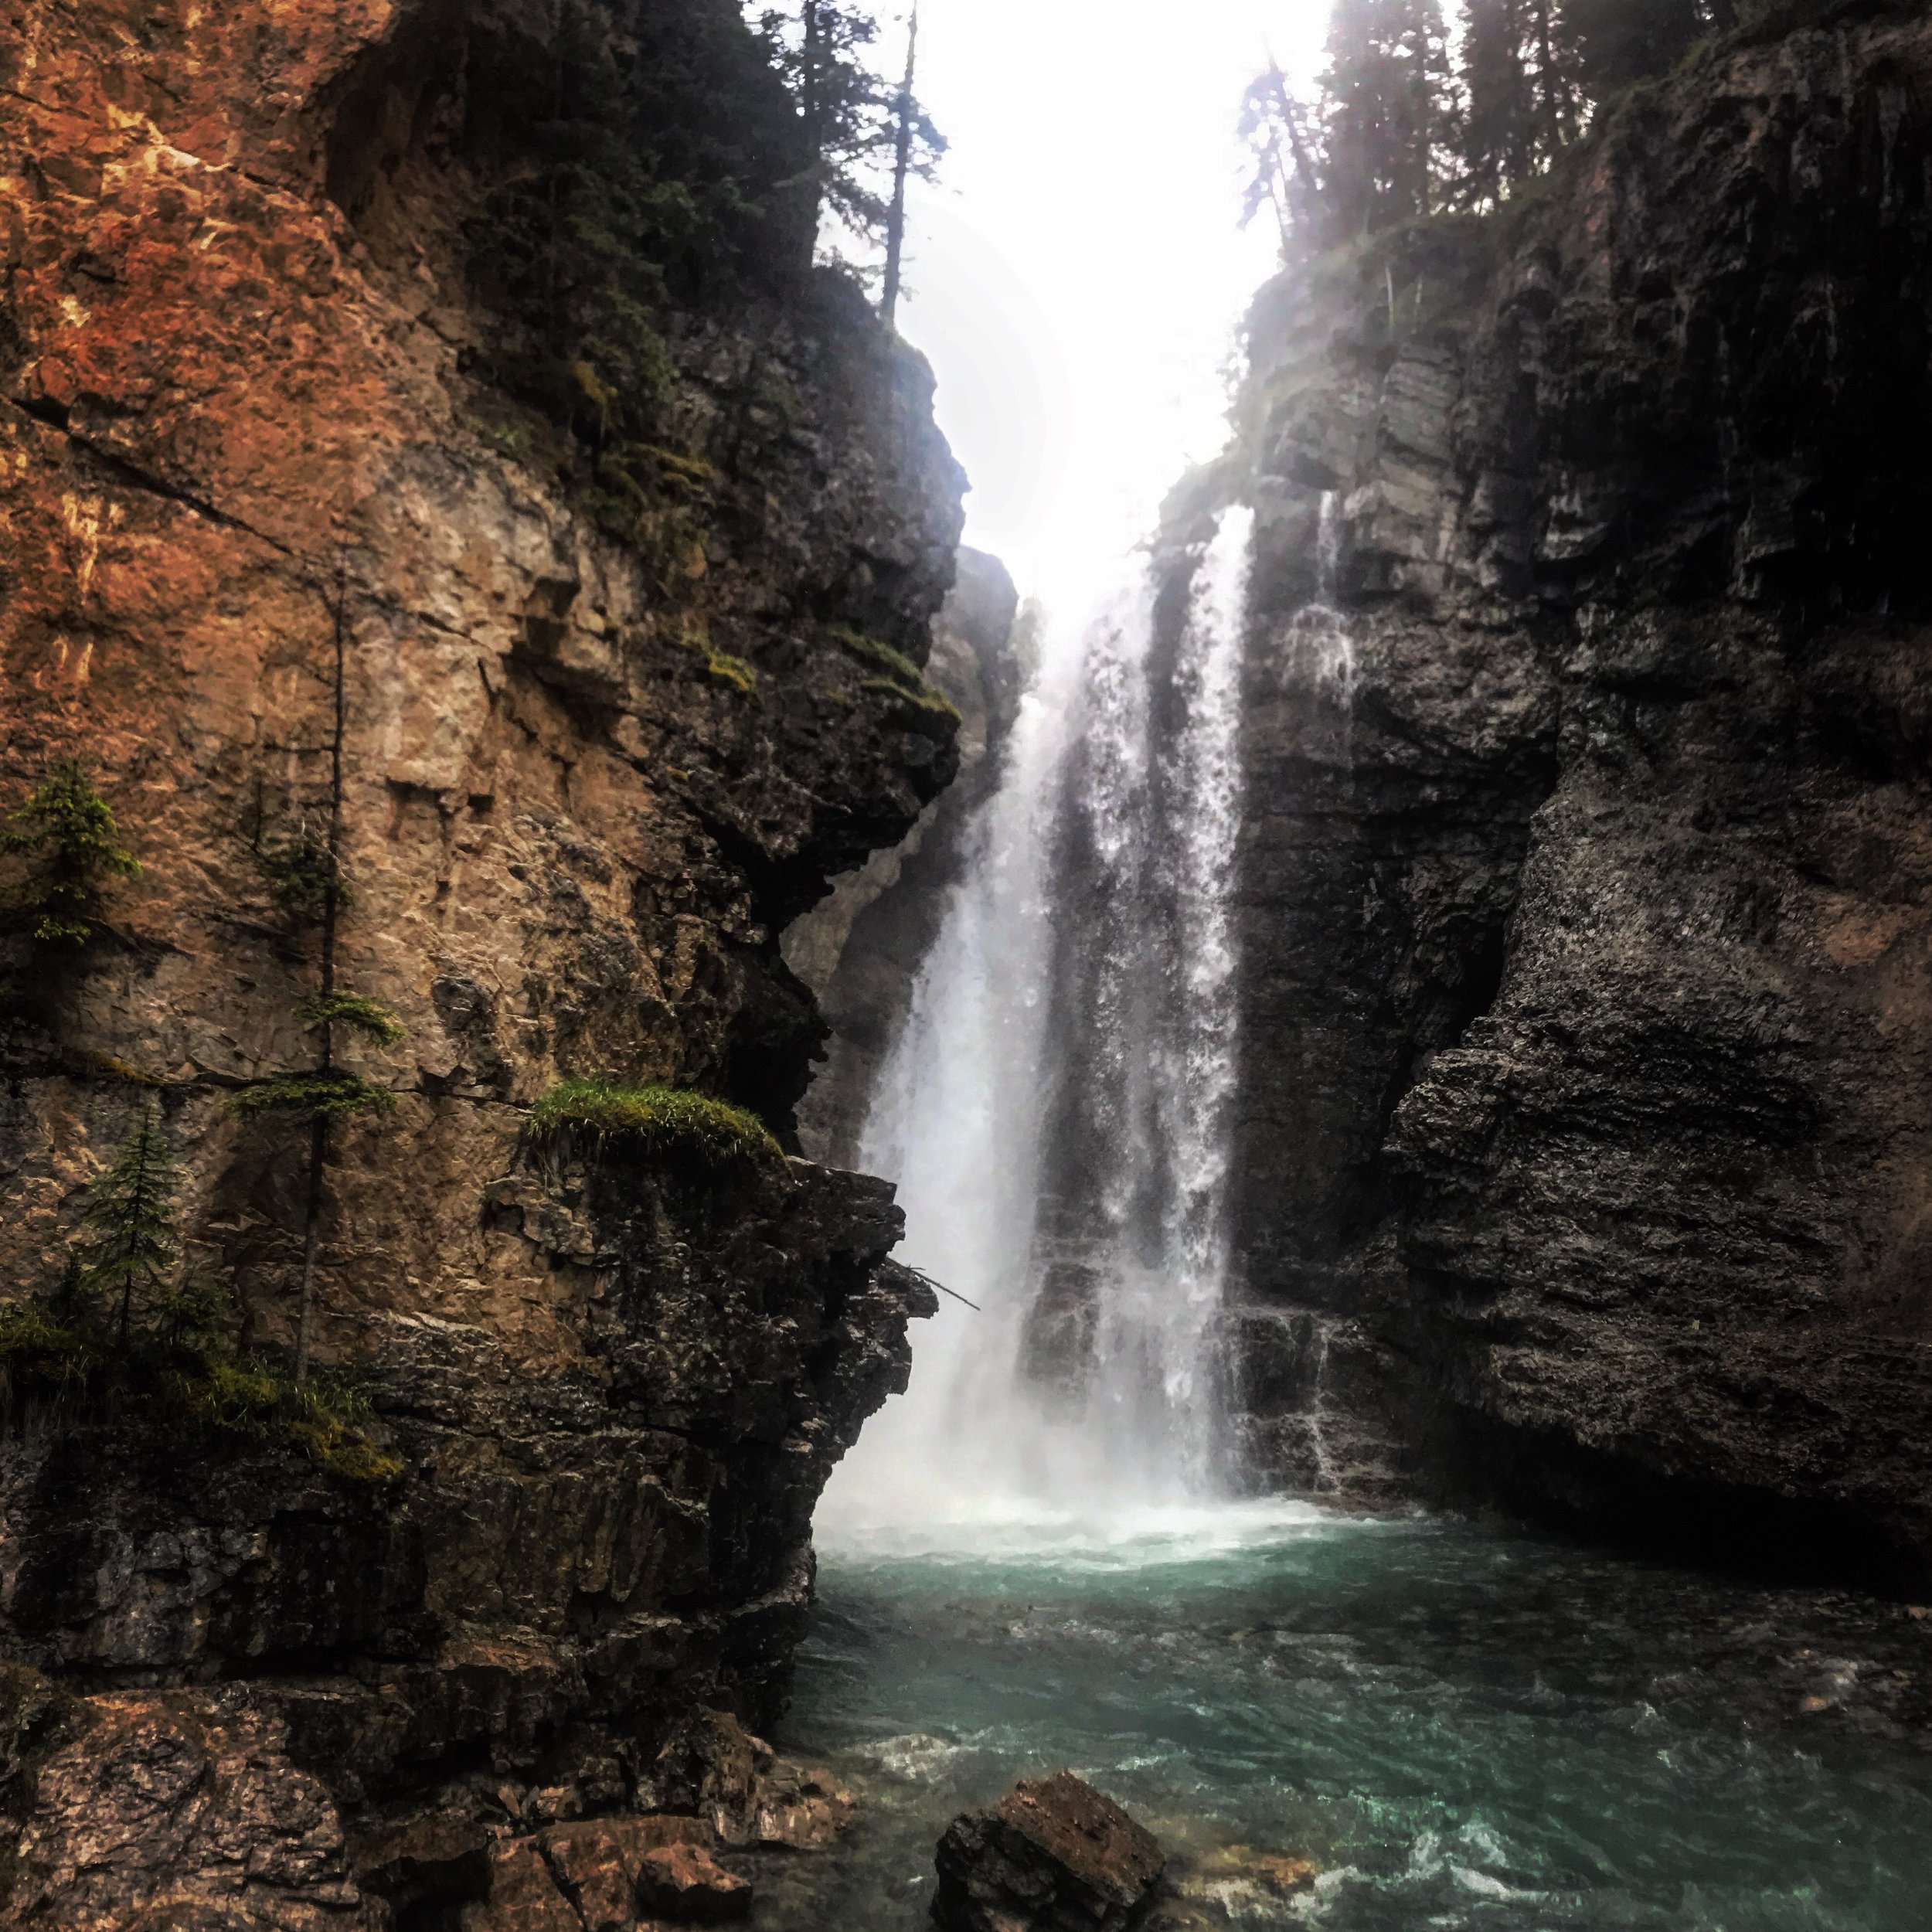
Upper Falls was very nice to see though. You get to stand on a platform above the river rushing below down to Lower Falls. When we reached here it was still pretty empty but on the walk back down to Lower Falls, we started to see more and more people coming up the route. By the time we reached Lower Falls, I really regretted not stopping there first!

The view of watching the water rush down from Upper Falls downstream

The view of watching the water rush down from Upper Falls downstream

Lower Falls - you can get more up and personal to it via a small hole in a cave.

Lower Falls - you can get more up and personal to it via a small hole in a cave.

When we reached Lower Falls, there were more people arriving. I had failed to notice that you can get up and close to the Lower Falls via a small tunnel in a cave, which holds about maybe 4-5 people at a time on a small standing area. It wasn’t terribly crowded, but compared to the fact that there was NO ONE here when we first arrived, I regretted not stopping to see this first and breezing on by on the way back. If it’s super crowded and you’re unable to get into the cave, it’s not the end of the world. The view is not going to be that much better or anything, but knowing that we could have seen it crowd-free earlier pained me, lol. By the time we returned to the parking lot, it was about 9 am. We were starving and decided to head back into town for a quick breakfast at McDonald’s before shooting back out to Sunshine Village.

OVERALL: Johnson Canyon is worth seeing, it’s an easy/medium level hike and enjoyable for all. Definitely try to start this as early as you can in the day, and bring a snack/water.

SUNSHINE VILLAGE

Next up in the jam packed day was a visit up to Sunshine Village. The weather forecast for Banff the time we were here at the end of June was mostly rainy. Sunshine Village is a ski resort about 20 minutes from Banff, but the attractions all sit at the very top of Sunshine Mt. We booked our gondola tickets in advance and I am very glad that we planned to come during the start of peak season as otherwise, the gondola/access up here is closed. So the day we went was the very first day of gondola operation (the last Friday in June).

As we drove from Banff to Sunshine, the rain and mist did NOT let up. I was very sad since the prior day we could not see anything at the top of the gondola in Banff. However, as we neared closed to Sunshine Village, it suddenly cleared up and the area lived up to its name!

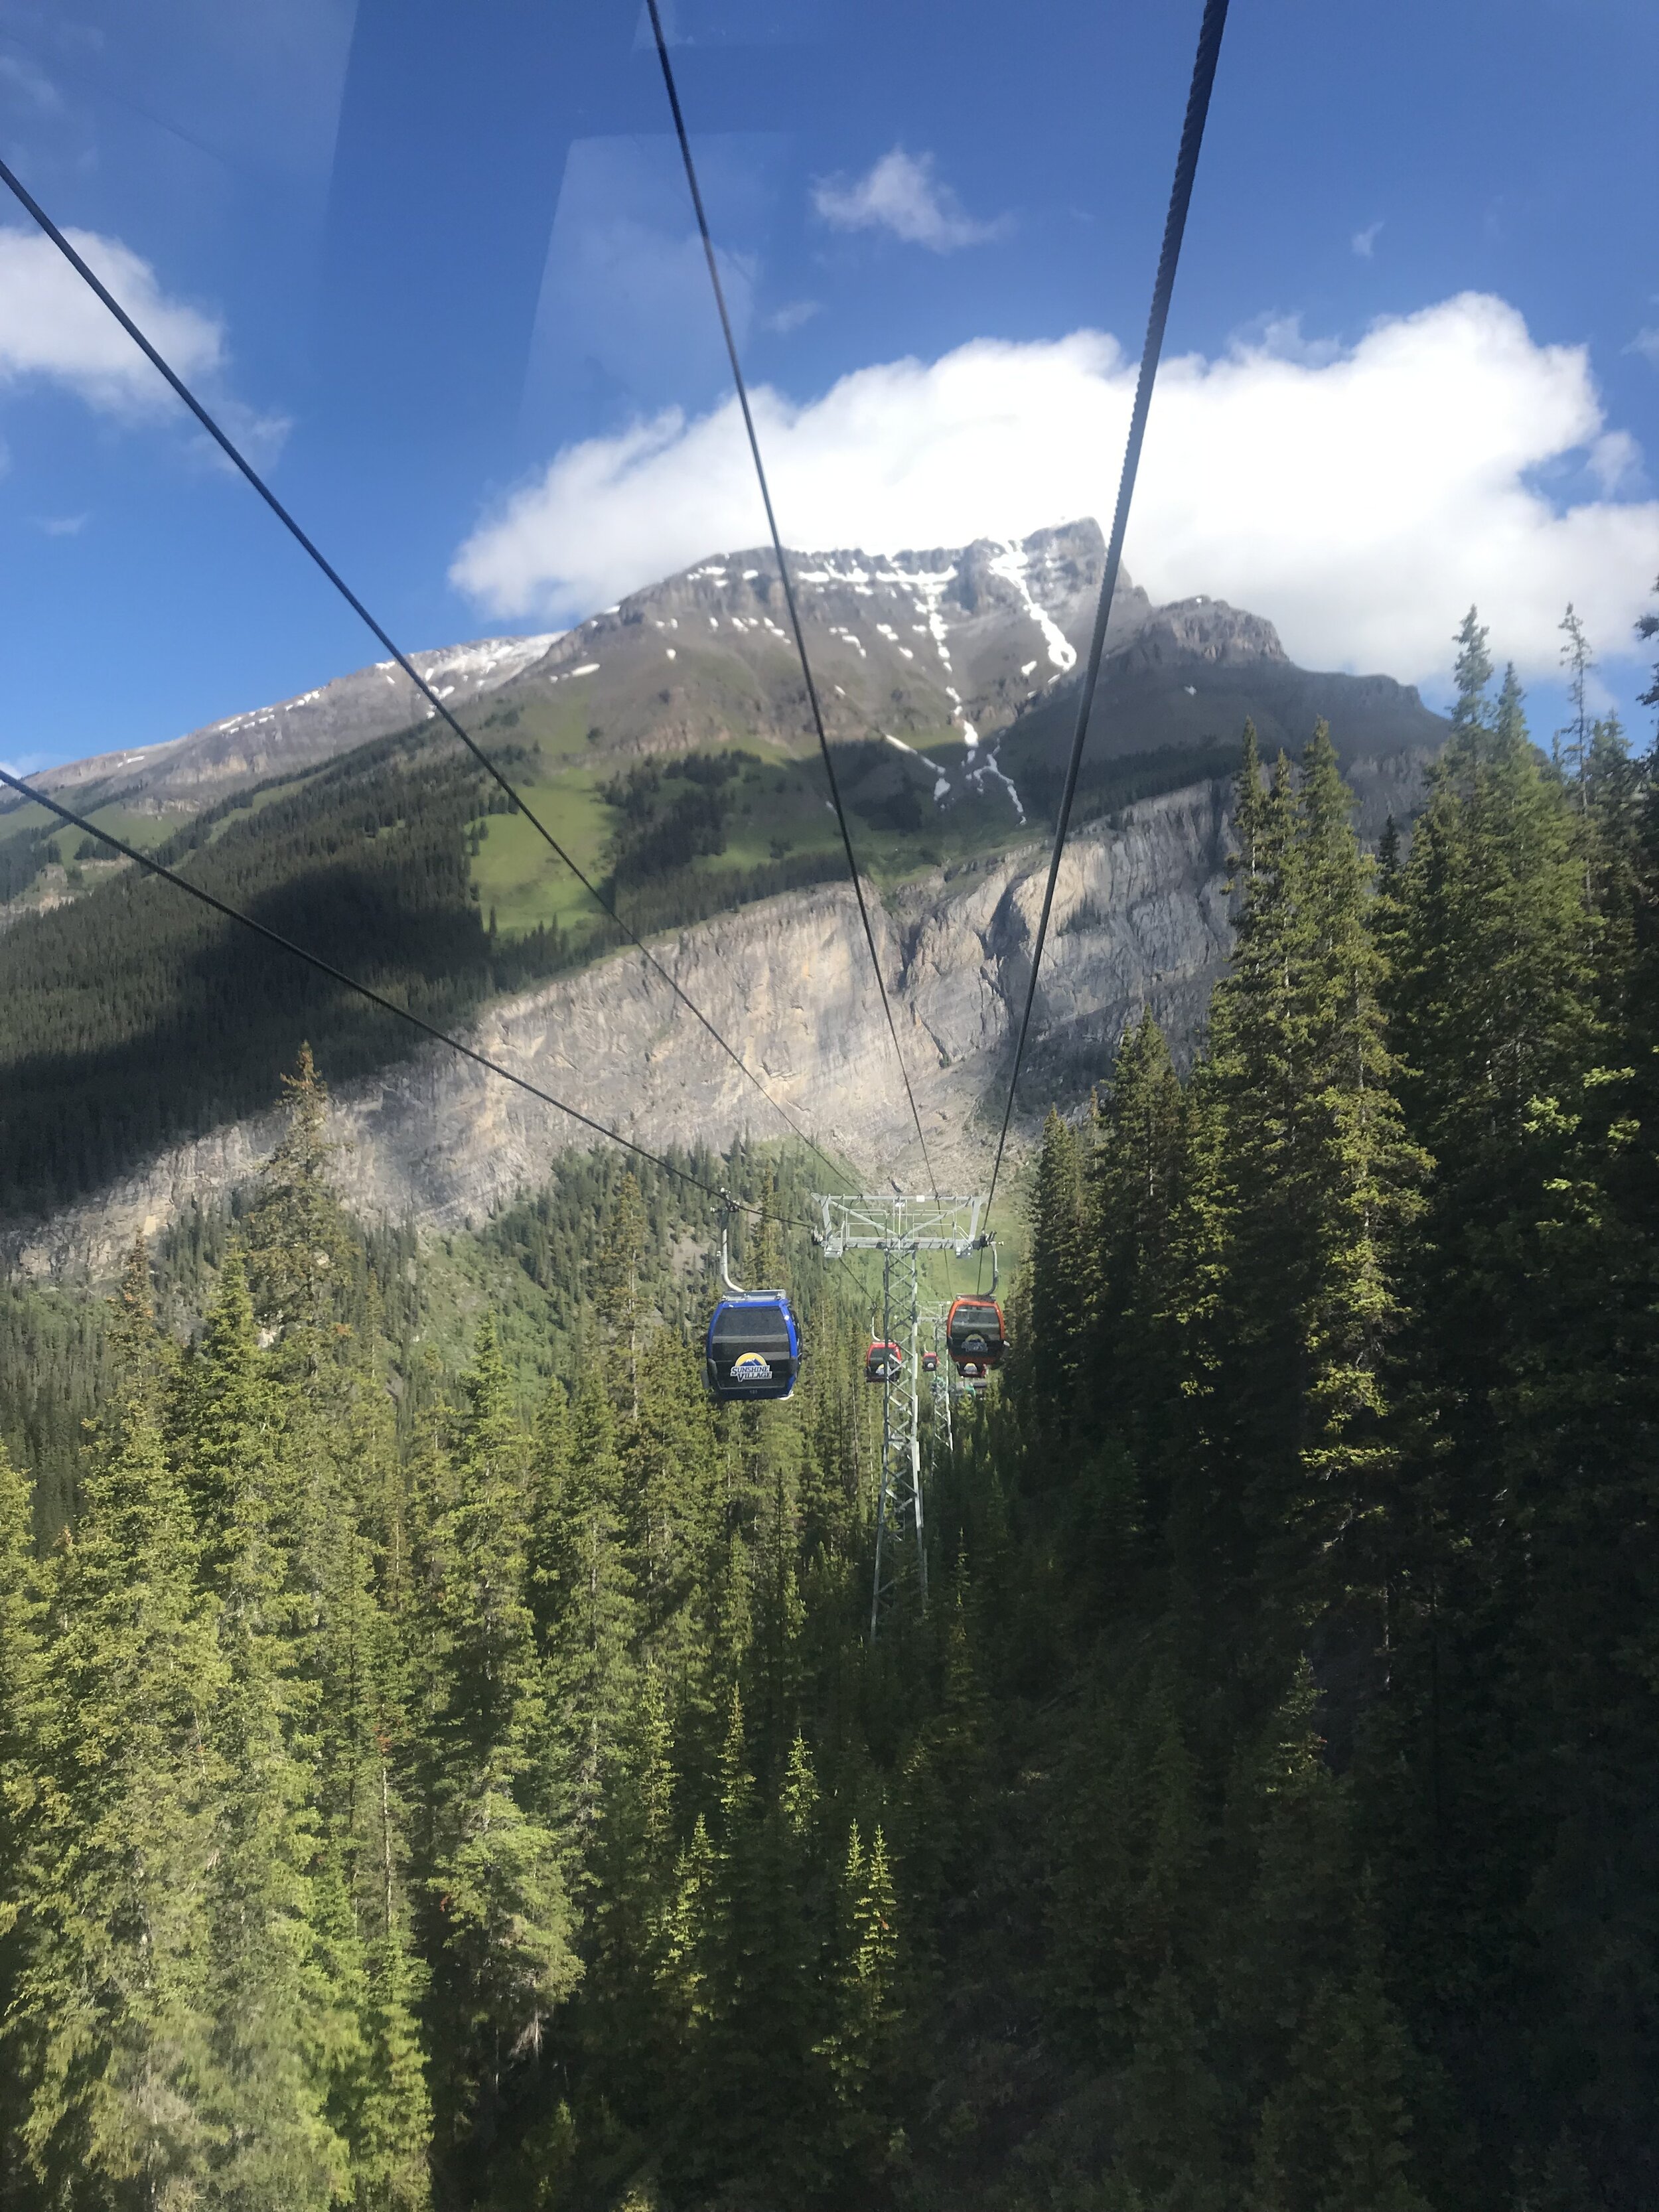
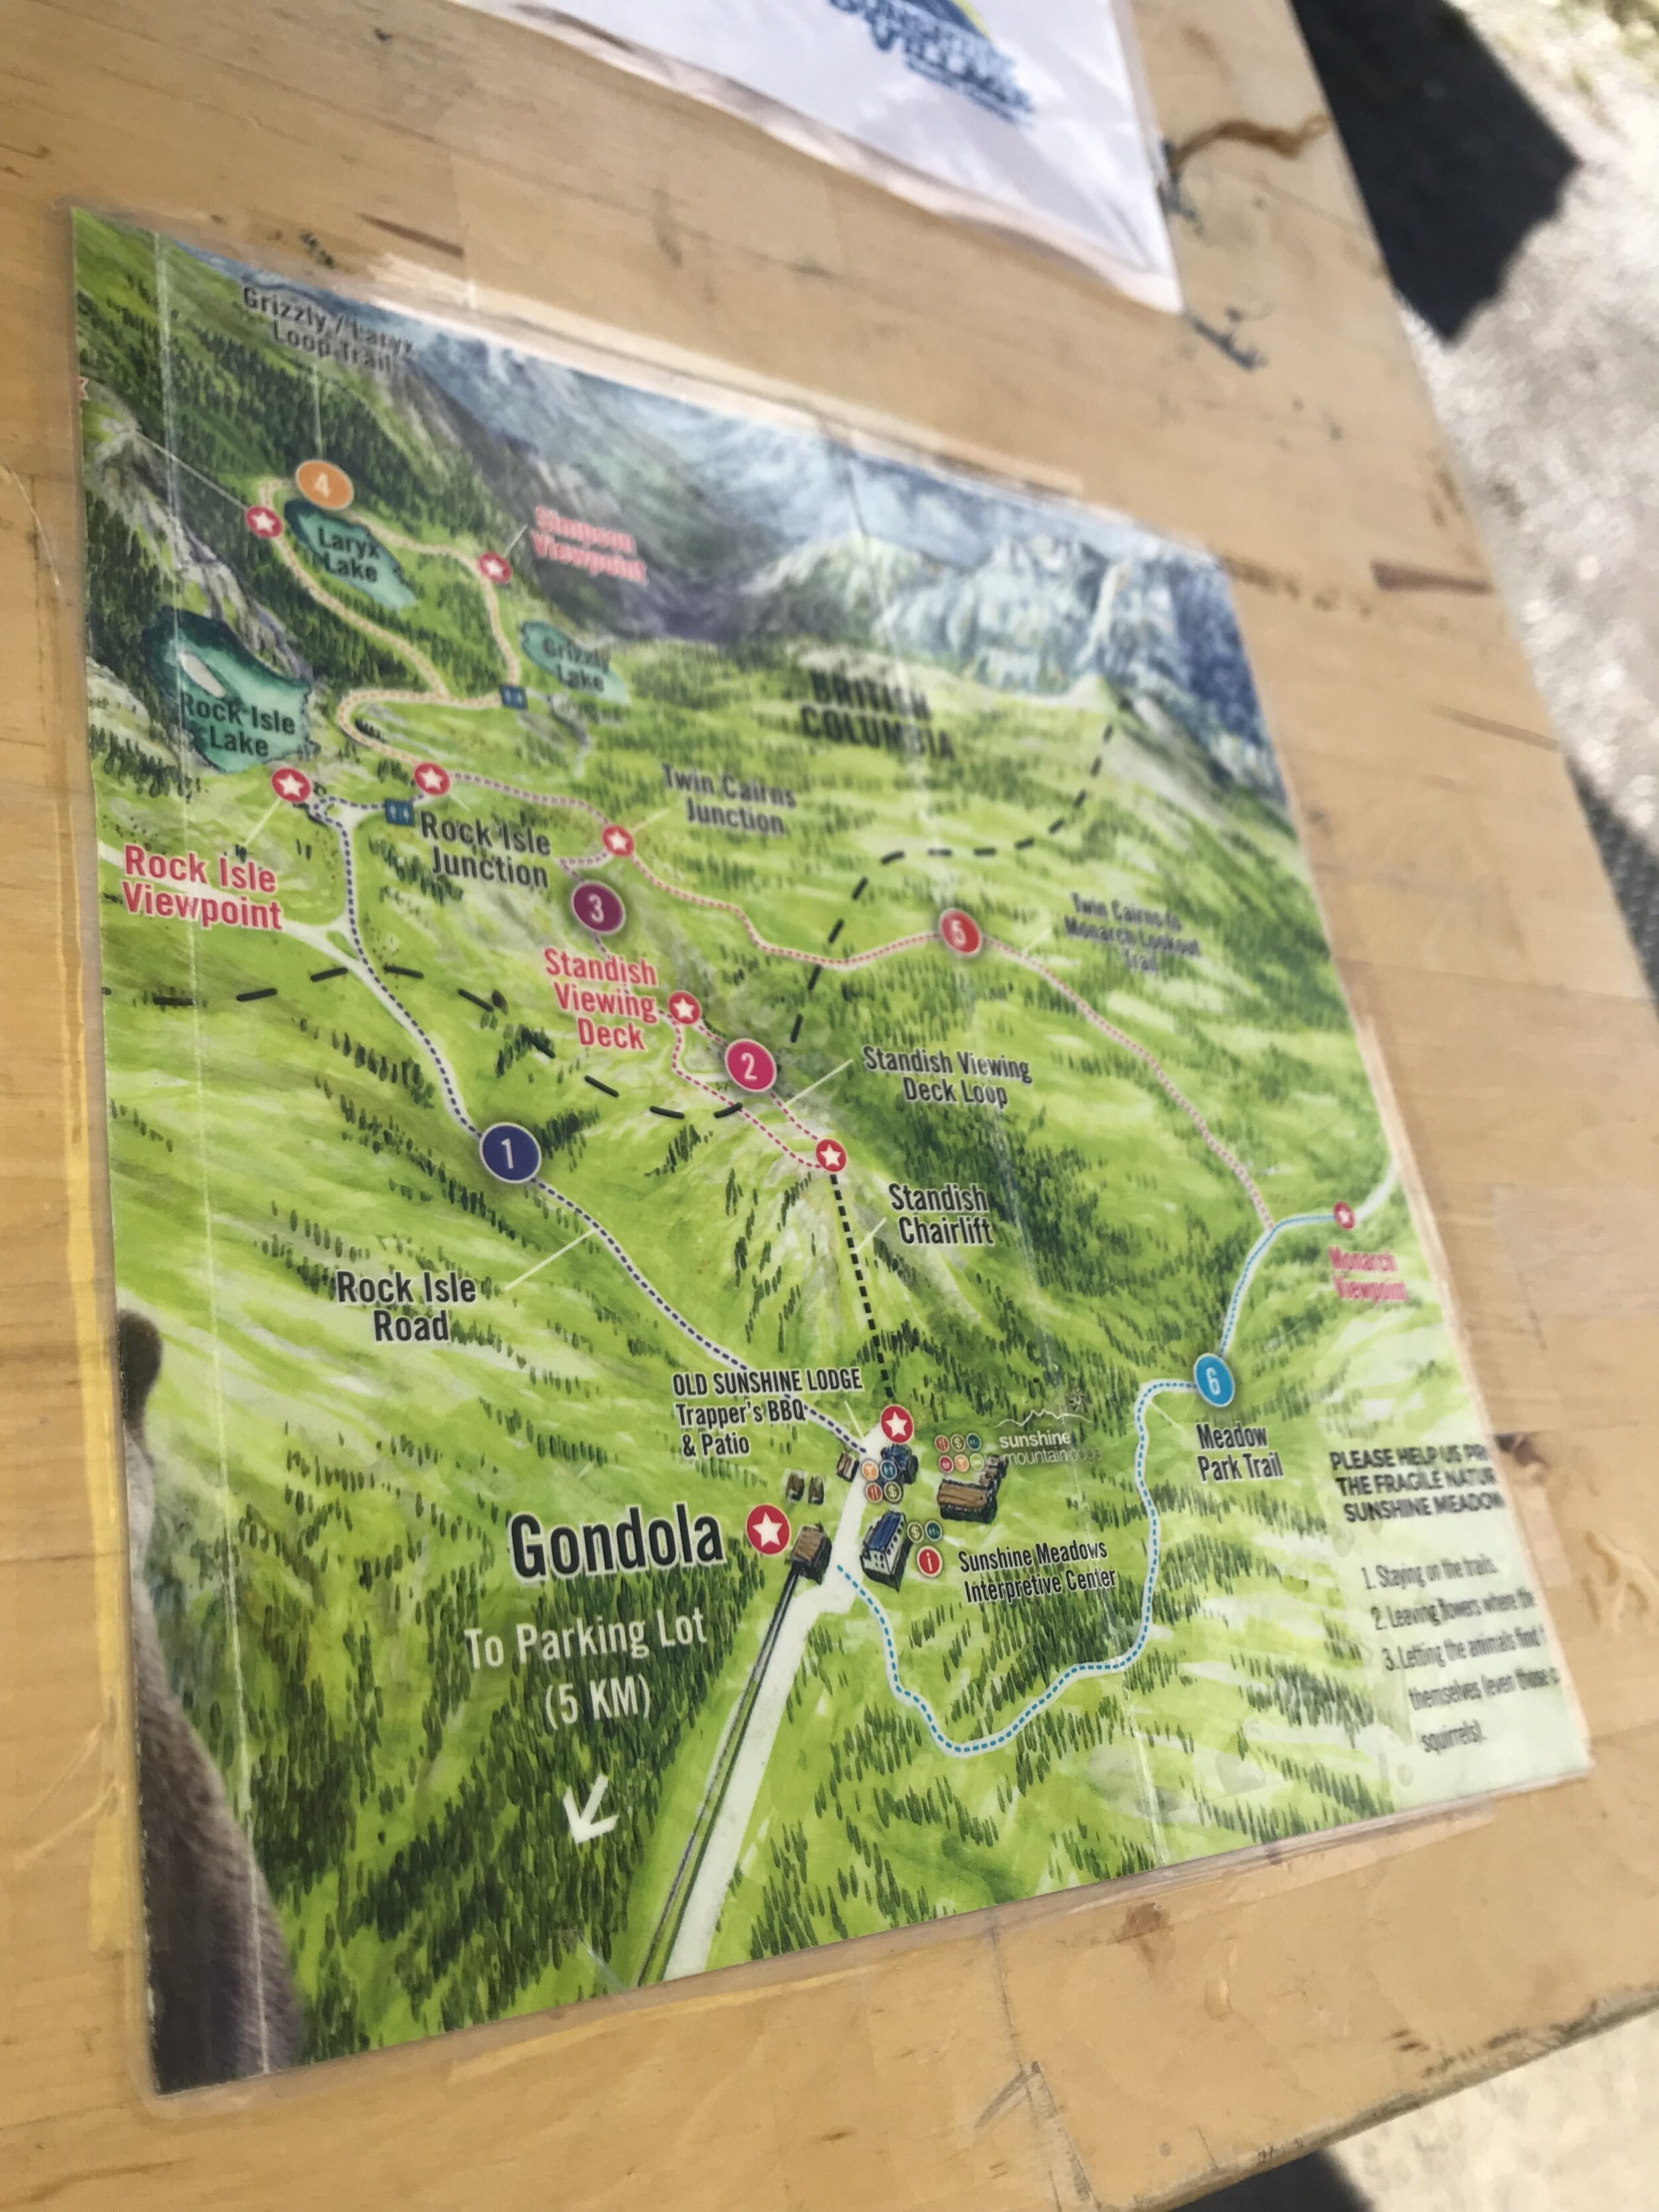
We arrived by 10:45 am (I had booked for 11 am) and off we went! This gondola ride was LONG because this mountain is HIGH. Also, be sure to dress warmly—it was much colder and windier at the summit. The gondola was a nice leisurely 20 minutes long but once we got off, we still had to head over to another ski lift to get to the very top! This ski lift takes you up to Sunshine Meadows, where you can see a few lakes and go for a hike. Before you get on the second lift though, there is a nice lodge where you can have lunch/grab a Starbucks coffee, use facilities, etc. You also have the option to walk up to Sunshine Meadows but that walk is not short. From what we saw on the second chairlift, it’s quite steep and long.

If you plan to come to Sunshine Village, it’s better to go on a day where you don’t have anything else to do in the morning. There is so much to see up in Sunshine Meadows and the last gondola ride down is at 5 pm. If you can start earlier in the day here, you’d be able to see more. However, what we saw was sufficient for us (since it was cold and early in peak season). On a warmer day you’d probably want to spend more time here.

By the time we reached Sunshine Meadows, it was about 11:30 am and we walked around and down to the Rock Isle lookout and back and finished by 1 pm. By time we took the two lifts down the mountain, it was about 3 pm in the parking lot. So yes, start early if you can!

View of Sunshine Meadows from the top of Sunshine Mt. (2 ski lifts up and 45 minutes later from the bottom!)

View of Sunshine Meadows from the top of Sunshine Mt. (2 ski lifts up and 45 minutes later from the bottom!)

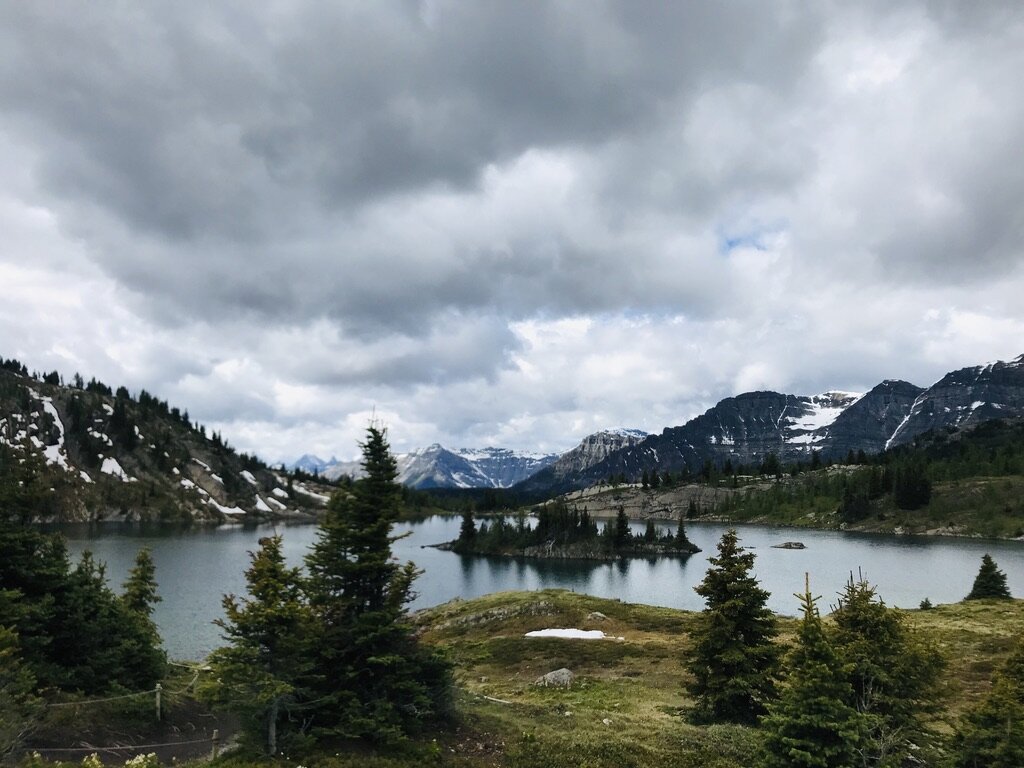
Rock Isle lookout — one of the many things you can see up at Sunshine Meadows

Rock Isle lookout — one of the many things you can see up at Sunshine Meadows

After we finished with Sunshine Mountain, we headed back to the hotel to rest up and have some late lunch. The town of Banff is very cute with lots of restaurants but also pricey. Think I just ended up getting a Subway sandwich because I wanted something quick and take a break on my bed!

LAKE MINNEWASAKA CRUISE

Since we were going all out on this trip, we bought the Ultimate Explorer Banff pass, which allows you to do three activities, such as the Banff Gondola, the Columbia Icefield Adventure and Skywalk, and the Lake Minnewasaka Cruise. While Banff Gondola and the Columbia Icefield activities were great, this cruise is SKIPPABLE! Only do it if you if you’re taking little kids and want an hour of boat cruising time without having to do any physical exertion. Our boat cruise was far from being relaxing, as there were tons of kids/families on the boat and the boat is not really that nice, nor there is not really a platform to stand outside or take pics in. There is a small area in the back of the boat, but it’s not really a ‘must do.’ Going down to the lake is recommended as it is beautiful, but to go out on the lake is not necessary. Plus the windows on the boat don’t make it optimal for good picture taking.

We took the 5 pm cruise, which is the last cruise of the day. They also offer a booze cruise but I think renting a canoe would be more interesting.

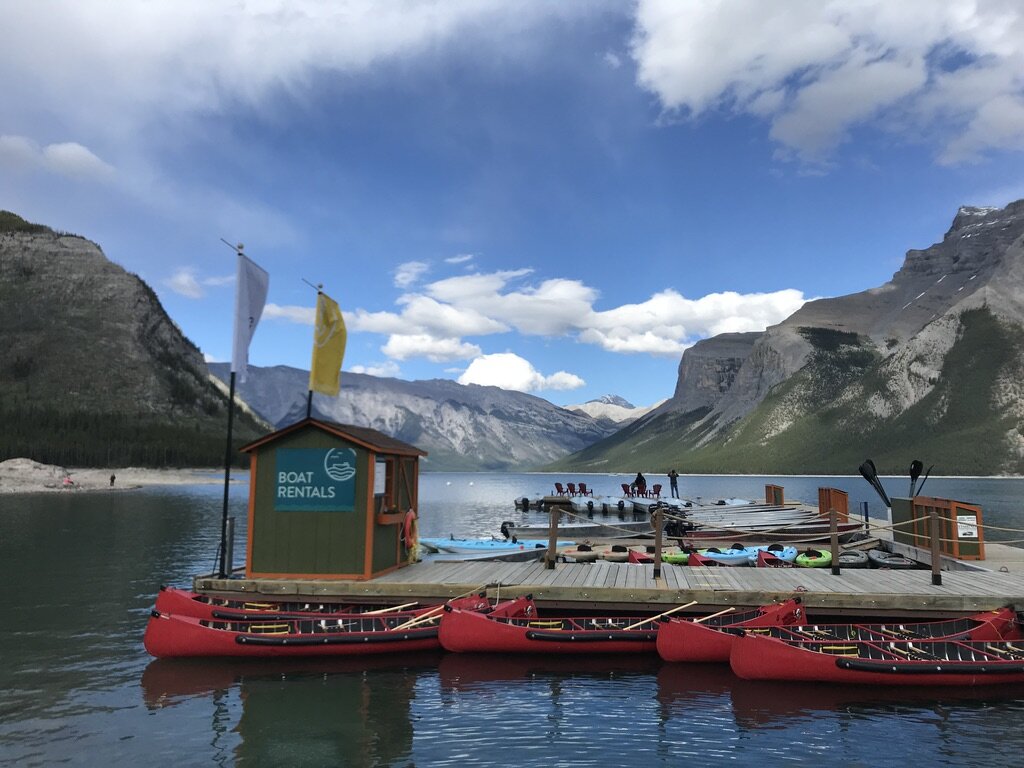
Lake Minnewasaka

Lake Minnewasaka

After returning to shore by 6 pm, we drove over Tunnel Mt. trailhead to check it out since it was nearby (the lake is about 15-20 min. from town). It was getting dark at this time so we didn’t try to do the trail, but wish we had time! This trailhead overlooks the town of Banff and there is limited parking, though you could walk from town to do it.

BOW FALLS

At around 7 pm, we decided to head over to Fairmont Banff to check it out. It’s open to the public and we parked nearby on the street. We ended up wandering around the grounds and finding a path in the back of the hotel (near the German restaurant!) to Bow Falls. Since we missed this the day before due to the wandering elk, we took the opportunity to check out Bow Falls and so glad we did! It was very pretty and lots of public parking next to it. The sun was starting to set lower so the lighting for pictures around this time was great, too.

Bow Falls Lake at around 7:30 pm in late June

Bow Falls Lake at around 7:30 pm in late June

Bow Falls

Bow Falls

This was the last thing we saw before heading to dinner and much needed night of sleep! A great packed day 2 of the trip though!

June/July 2019 Trip Report: Planning for Banff & Jasper National Parks

In case you’re unaware, I am very OCD about planning my trips. Mainly because time is money and time is also very precious to me. However, as much as I am a scheduler, I also add in flexibility to my vacation schedule as I know you can’t control everything (especially the weather!).

Earlier this year (January 2019) I spent a good 3 weeks planning my summer 10-day vacation to Banff and Jasper National Park’s. All that planning and research really paid off though as we’ve been having a wonderful time out here in Canada and yes, you really do need to book things that early! There are limited accommodations throughout the park so if you want to limit the amount of time of driving back and forth from place to place because you couldn’t get a room, definitely book by early January. Even when I was looking, a lot of the rooms I wanted were booked up! However other places also didn’t open up their reservation system for the summer until just after New Years (i.e., the wonderful Alpine Village in Jasper). I may have even started planning a bit around Christmastime last year, now that I think about it!

Planning for Banff & Jasper National Park (with a bit of Yoho on the side)

My holiday in Banff started at the end of June 2019, flying out Wed. June 26 and leaving Saturday, July 6. I’m currently still in Jasper (writing a long post since it’s been raining all day!) and I will say that I think you can do all the highlights in a week. However, it’s nice to have a couple of extra days to relax and unwind or to burn in case of bad weather. One great thing about the park system here is if you make a reservation for a gondola ride or lake cruise online, you can change it if your plan or weather changes.

Below is a brief outline of out overall itinerary as well as places we stayed at and brief comments:

The town of Banff on our first day (which was unfortunately cloudy and foggy).

The town of Banff on our first day (which was unfortunately cloudy and foggy).

Trip Overview

  • Flew into Calgary International Airport from JFK. Stayed one night at the Country Inn & Suites by Radisson near Calgary Airport. Great easy hotel, seems new, very comfortable and clean, decent free breakfast. We arrived at 9 pm so had to stay the night.

  • Drove 90 minutes from Calgary to Banff, stayed for two nights at Mount Royal Hotel. Loved it here, very boutique and luxe feel. Worth the $$$. No breakfast but nice rooftop indoor lounge and outdoor hot tubs (which were always in use). Centrally located with parking.

  • Drove 60 minutes from Banff to Lake Louise, stayed for two nights at Mountaineer Lodge. Based on my research, they just renovated these rooms in the past year and it shows! The outside may not look like much but inside was very comfy, clean and well laid out. Free breakfast included and parking. The proximity to Moraine Lake is CLUTCH. One night is really enough here but I’m glad we stayed two in case the weather was bad (and we definitely found things to do). Also, book this place early!! I initially booked one night back in Jan. and a few days later, tried to change it to two but the original room size I wanted was sold out so had to upgrade to a bigger one (which was ok since I’m traveling with two others anyway). The hotel allowed me to get the bigger room while paying one night fee of the smaller room, which was nice (I e-mailed them to ask if I could have the smaller room for two nights but glad we got upgraded for one night instead). While we stayed here, we saw a few tour buses here so it gets booked out for those groups. Has an indoor hot tub/sauna/locker rooms near the reception which I wish we got to use but didn’t have time.

  • Yoho National Park is twenty minutes away from Lake Louise, which is why we chose to spend two nights, not one here. Yoho is more underrated than Banff and Jasper. Emerald Lake is the highlight here, and if you want to go see Lake O’Hara, you must make rsvps online in advance as only shuttle buses are allowed to travel down there. I didn’t do this but it’s an option.

  • Drove 3 hours from Lake Louise to Jasper, stayed four nights at Alpine Village Jasper. This place was SO WORTH THE MONEY. It’s expensive, but it’s the #1 rated place to stay in Jasper and they just renovated all their log cabins in 2018. It is so cute and cozy and feels like they were built yesterday. The grounds are so well maintained and it’s a comfy place to hang out in when the weather is bad. I think two nights is good for Jasper but we don’t mind staying four as we did a lot on this trip and it’s nice to relax and unwind in the country the last couple of days. If you pay in cash, you save a bit on taxes (plenty of ATMs in Jasper. Also side note: you really don’t need cash for anything else). Has a nice outdoor hot tub area but we didn’t use. Cooked meals in the nice clean kitchen.

  • Plan to drive 4-5 hours back from Jasper to Calgary on July 5 for our flight home to NYC July 6 (staying at another hotel airport).

  • Other tip: If you’re doing a 10 day trip like us, it’s a better value to buy the ANNUAL pass for Canada’s National Parks. You can do this when you arrive at the park gates. Once you buy a park pass, you hang it on your car. Otherwise buy the pass that best suits you but generally anything longer than a week, you should just get the annual pass.

  • Other things I booked online in advance included:

    • The Ultimate Explorer package. This included entry to the Banff Gondola ride up Sulphur Mt. (was foggy when we went but otherwise seems like it would be spectacular to do on a sunny day), a cruise on Lake Minnewanka (skippable), and the Glacier Adventure & Skywalk tour on the Columbia Icefields (nice, if you like glaciers and scenery). I booked this a few months earlier but you can wait a few weeks before your trip.

    • Gondola at Sunshine Village. This is a must do! I loved it. It’s a very long 20 min. ride to the top, and then another chairlift to the very top to Sunshine Meadows, where you can go for multiple hikes down to lakes sitting up 8,000 ft. at the top. Breathtaking, especially on a clear day (our day was partly cloudy). I booked this a couple of weeks before we left. The first day of operation was June 28 so you definitely should check/plan your trip around when they open (which is what I did when I started research back in Jan.).

    • Jasper Skytram. Also a must do. Gorgeous views of Jasper and the opportunity to hike up a mile up to the top of Whistler summit. You’re basically walking above the clouds up here! They are running a summer promotion where if you get on before 10 am (it opens at 8), you get a free breakfast at the restaurant at the top! Amazing value and also great views. They run the same promotion for after 5 pm for dinner. You only get like 3 food choices but it’s still a nice deal. Peak tram times seem to be btwn 11-5 (when we left by 12:30 pm it was soooo crowded. We got there at 8:15 and it was quiet and so enjoyably peaceful). Booked this a week before we left.

    • Maligne Lake Cruise, premium. If you want to do a lake cruise, I would pick the Maligne one over Minnewanka. And you should do the premium one so you can have a nice little walk on Spirit Island (half hour stop which is enough) and take in some nice pictures. After seeing so many lakes here, they all pretty much start to look the same. Minnewanka is very nice and you should definitely stop over to see it but no need to do the lake cruise (just motors out to the middle and back, and there isn’t a huge outdoor walking deck on the boat).

Another thing you can do/book in advance is the Lake Louisa gondola ride but I think it’s probably less impressive than Jasper, Banff, and Sunshine (we went there and looked at the webcam views from the ticketing office).

So with all that being said, I’ll try to recap my trip by day so you get an idea of how much was crammed in.

Day 1: Banff

Banff Gondola up to Sulphur Mt.

Banff Gondola up to Sulphur Mt.

We arrived in Banff on Thursday morning from Calgary at about 10 am, leaving Calgary by 8:30. The day was pretty cloudy and drizzly but we really had no other time on our schedule to do this so we up to the top anyway.

At the top—nice observation deck

At the top—nice observation deck

We could not see a thing but there were several indoor exhibits inside including a brief movie on the park and other factoids. There is also a nice boardwalk outside where you can walk up to the weather station and we enjoyed that even though we couldn’t see much. The clouds did lift a bit but overall not much of a view, I was okay with it though as I knew we would have other nice days and views ahead.

Boardwalking in the clouds

Boardwalking in the clouds

Afterwards we headed down on the gondola and walked around town a bit. The town of Banff is so cute with a lot of character, shops, and restaurants. I like it better than Jasper though Banff is probably more commercialized. Banff is more concentrated and compact though while Jasper feels more spread out and rustic.

IMAGE.JPG

Since it was drizzling we were limited on what we can do outdoors. Banff has a TON of things to do and we only did a handful of it all.

After some lunch, we checked out the Cascade of Time Garden, which is free and easy to get to. Everything in Banff is easy to walk to, which is why i think I like it more too.

Cascade of Time Garden

Cascade of Time Garden

From there we tried to walk to Bow Falls Viewpoint (about 15 minutes from the garden) but when we arrived near the trail, we saw it was all roped off by the rangers. Apparently it’s calving season and this mama cow elk has been charging at hikers since she has a baby calf with her!

Mama Cow Elk

Mama Cow Elk

There were at least 5-6 rangers trying to herd her off and away from the trail so that was cool to see. You will definitely see animals coming into Banff/Jasper! We have seen at least one kind of animal every day.

IMAGE.JPG

Since we couldn’t go to Bow Falls Viewpoint, we decided to go to Surprise Corner instead, which is probably a 15 minute walk from town but we drove there since it was raining. After you park at the designated parking lot, walk along the side of the road where you can hear the raging rush of the Bow River and you’ll get a great view of the Fairmont Banff.

Bow River

Bow River

Fairmont Banff

Fairmont Banff

This was all we got to do on the first day. We had wanted to do Tunnel Mountain, which is a hike next to Surprise Corner and is supposed to be a great view of the town but due to the weather and time constraints, we were unable to do it.

November 2018: Day 2 & 3 W Trek Recap (Patagonia)

Day 2 W Trek Recap: 13 km (8 miles) from Refugio Torres Central to Refugio Los Cuernos

Day 2 was my favorite day of the W Trek mainly because I woke up energized and ready to tackle the day. Part of this exuberance stemmed from these electrolytes that were laced with caffeine but who cares, I’ll take it! My muscles were sore and stretching them the night before and the morning of really helped. Breakfast at the refugio was nice but very basic (eggs, ham, cheese, cereal, bread and yogurt). We started our hike at 9:30 am and had to retrace some of the trail we took yesterday before it splits off to Los Cuernos vs. Mirador de Torres del Paine. After about a half hour, we reached ‘new trail’ and off we went.

IMG_1771.JPG

We had another brilliant day of warmer weather, sun, and no wind. The hike was not super easy but definitely easier compared to the day before. There were a couple of intense steep uphills for 20 minutes but overall this trail was a gradual ascent and descent throughout. After about an hour after we started, we came to this gorgeous view. I love how these two lakes are completely different tones of blue.

FullSizeRender.jpg

We hiked alongside Lake Nordenskjold for most of the trail and it was a brilliant, clear aquamarine. I remember thinking how beautiful this part of the trail was and I couldn’t imagine seeing anything more beautiful. Pictures don’t really do the views justice, everything is magnified in person.

FullSizeRender.jpg

Even the guides remarked how still the weather was. Generally due to the winds, you’d see ripples and waves on the lake, not a perfect reflection. In the two years one of our guides has been doing this trek, he said he’s only seen it like this a handful of times, when the weather was gorgeously calm.

IMAGE.JPG

This is the main reason why I would never do the W Trek again. I can’t imagine my experience being better than what it was with the incredible weather we had. Although I braced myself for wind and rain, we luckily only experience one day of it.

IMAGE.JPG

Our initial plan was to hike all the way to Domo Frances, which would’ve been another two hour hike after Los Cuernos and this section of the trail is steep. However, when we arrived at Refugio Los Cuernos for a break, our guides checked with the lodge and they had space to take us! Apparently a lot of tour companies may block off rooms but I guess there was a cancelation. The lodge allowed us to switch (although Domo Frances and Los Cuernos are operated by two different companies, I guess they work together somehow and allowed it to happen). I was relieved as Domo Frances has pretty crap reviews, even though it’s one of the newer ones. Thus we ended up finishing the day early before 4 pm and just hung out and relaxed around the lodge. You can even hear the avalanches from the French Valley here (I heard a couple in late afternoon!).

Day 3 W Trek Recap: 17 km (10.5 miles) from Refugio Los Cuernos to the French Valley to Refugio Paine Grande

This day was TOUGH and might have been even worst than the first day as it felt much longer than the 8 hours it took. We left at 8:30 am and finished at 4:30 pm. I woke up super early at 5:30 am as I wanted to see the sunrise hit the mountains and exude the sky with red. However I just missed the golden hour and only caught remnants of it (I should have skipped brushing my teeth and headed out then!). The other days were cloudy in the morning so there was no other chance.

IMAGE.JPG

From Refugio Los Cuernos, we hiked a very pebbly path to the beach by the lake. At the end of this was the start of an uphill climb towards Domo Frances and Refugio Italiano. We got to use decent bathroom facilities near the campsite of Domo Frances (we never saw Domo Frances as you need to go down a different pathway) and then continued on to Italiano Campsite to start the roundtrip hike up to the French Valley to see glaciers and listen to avalanches.

IMAGE.JPG

The hiking along this portion of the trail seemed rockier and it was definitely steep but not as steep as the very first day. Once in a while I would look up to see the views behind us but for the most part it was just go go go.

IMAGE.JPG

We reached the Italiano Campsite (no refugio here, just tent camping) at about 10 am and dropped off our large hiking backpacks (everyone does this but don’t leave anything important just in case!) and switched to carrying just a daypack to the French Valley. It took about two hours to get up to the overlook and we had our lunch up there while admiring the view and listening to the crumble of avalanches. This picture below doesn’t capture all of it—it’s much wider and grander in scope. We stayed up here for about 45 minutes before heading back down to pick up our bags and continuing on to Refugio Paine Grande.

FullSizeRender.jpg

After getting back to the Italiano Campsite, we headed westwards towards Paine Grande and it started to get really hot and sunny. It didn’t help that there was zero shade. In Dec. 2011 an Israeli backpacker set this forest on fire by accident and it burned for two months, destroying wildlife and a lot of this area of the park. He has since been banned from the country but the damage is brutal. Due to the damages, there are quite a few boardwalks around here instead of trails. By this point I was really tired and had to start singing songs to myself to get through the hike and make the time go by quicker. In total it took us about 2.5 hours to get from Italiano to Paine Grande but it felt way longer than that. During the last 40 minutes, the bottoms of my feet began to feel like they were burning, which I’ve never felt before when hiking.

IMAGE.JPG

This view below of Los Cuernos though was the highlight of my day. I’ve seen a bunch of glaciers already (New Zealand, Alaska, Iceland) and so to me, the terrain of mountains, lakes and valleys are more appealing to me. I remember sitting here and staring at this and it looked so unreal even though it was right in front of me.

FullSizeRender.jpg

As we moved closer to Paine Grande, the wind REALLY picked up and apparently this area of the park is the windiest. We were so hot and sweaty though that the gusty winds helped invigorate us to get to the end. I remember feeling a small ounce of joy once the refugio came into view from afar. As I mentioned in my Refugio post, this was my favorite place to stay because I loved the scenery around it. It was a great relief to kick off our shoes and enjoy the warm windy evening outside by the lake and watch the sunset.

IMAGE.JPG

Skipping stones and chatting with everyone else from our tour group here was my favorite evening of the trip.

IMAGE.JPG

November 2018: The Refugios of Torres del Paine

The refugios of Torres del Paine are hostels inside the park and serve as points of rest and refuel after a long day’s hike. I didn’t know what to expect and for the most part, I found the refugios to be clean (as they can be given the amount of people who stay in them!) and I’m glad we booked early (in May 2018 for the November 9th trek with Chile Nativo). Some people in our ten person guided tour had to sleep outside in tents as beds were booked up (they booked about a month or two before we left).

The four we stayed at during the 5 day trek were:

  1. Refugio Torres Central

  2. Refugio Los Cuernos (we were supposed to stay in Domo Frances, which is one of the worst-reviewed places and further west on the trail but when we got to Los Cuernos, they had room and allowed us to switch!)

  3. Refugio Paine Grande

  4. Refugio Grey

Of all the refugios, I think Paine Grande was my favorite. It’s one of the newest ones and it’s nicely decorated inside, huge, and cozy and the landscape of Los Cuernos in the back is breathtaking (see last pic below). The dinner here was also the best (juicy big piece of chicken) but the bathrooms were kind of terrible by the time we left in the morning. Paine Grande is different than the others as I think it’s owned by the government who leases it and operated by a private company. You’ll just notice the service is different. The other Refugios are run by private firms.

I also liked Torres Central—it’s a big beautiful cozy lodge with warm common rooms but I just thought the view of Los Cuernos at Paine Grande was the best view of any refugio. In terms of comfort and cleanliness though, Torres Central was the best. Torres Central was also the ONLY one of the four lodges that had personal closets for your bags/personal stuff (you need a lock to lock it though).

Refugio Los Cuernos was my least favorite. Although it was nice, the food wasn’t as good, the staff didn’t seem as friendly as the others, and the rooms and bathrooms were the smallest. We were also given sleeping bags to sleep here inside the beds as there’s no heating.

Refugio Grey was also nice, the staff was friendly and the rooms were clean and cozy and the food was good too.

Staying at the Refugios vs. camping is more expensive but includes all your meals. I’m not sure the price of each since we booked with a tour but it’s not cheap given the fact you’re sharing rooms and bathrooms with everyone else. But there are no other options so it is what it is, unfortunately.  

Pretty sure this bag from REI weighed anywhere between 16 and 19 lbs. during the trip, depending if I wore my fleece jacket and how big the bagged lunches weighed. Glad I practiced hauling 20-25 lbs. on my shoulders weeks before the trip! This bag i…

Pretty sure this bag from REI weighed anywhere between 16 and 19 lbs. during the trip, depending if I wore my fleece jacket and how big the bagged lunches weighed. Glad I practiced hauling 20-25 lbs. on my shoulders weeks before the trip! This bag is great though—it really distributes weight evenly and is comfy (the shoulder straps are cushioned).

General Characteristics of the Refugios (Here’s What to Expect)

  • Bring your own toiletries and towels. Even though a couple of them offered shampoo/soap, it didn’t mean it was always available. Only two of the four (Torres Central and Cuernos) had any soap for the showers.  The bathrooms are cleaned certain times of the day (generally when everyone is out/sleeping) and hot water is also only available at certain times (generally after 5 pm). Towels were not always given.

  • Lights out at 10 pm (maybe a little later at others). This goes for electricity too so if you’re charging your phone, you might need to wait until the morning to finish up.

  • Dinner is served buffet-style or by meal times. There’s usually two meal times and you have to sign up for them. Our group sometimes had the early dining seating, sometimes later. Same with breakfast.

  • Water may/may not be available to fill up. For example on the first night, I was able to get water from the bar at Refugio Torres Central (they had a big water jug) but by the morning they ran out and wouldn’t offer anything for your personal bottle. Glacier water from the rivers and streams around the park is way better anyway but it’s so dry out there that having your bottle full is important! Bring electrolytes for added hydration!

  • Toilet paper must not be thrown in the toilet. As a result, the women’s room would stink after a few hours especially in the morning and late at night. It’s all thrown in the garbage, which may/may not be efficiently taken out (although the staff seems to try to keep up with it).

  • Any trash you take in with you into the park you’re expected to take out. The only trash cans that exist are the ones in the bathrooms so I would throw away the little litter I had in here. Trash is carried out by horses since there are no cars around either.

  • Hot water is a commodity but I never had any issue with getting a hot shower at any of the refugios. One shower you had to press every 90 seconds to keep the water going but otherwise I was able to take a decent shower at each refugio after every hike.

  • My trip was in November and while the refugios seemed full to me, not sure if they were. I never felt like it was overcrowded though. If you’re paying to tent outside, they set up the tents for you and provide everything but the tents may be a bit far from the bathroom areas. There were howling winds at night in a couple of the places we stayed at—not sure it’s pleasant to sleep in a tent but it is cheaper. I had bunk beds the whole time with my friends, anywhere between 4-7 people in a room. Co-ed as well. Bathrooms are not co-ed though.

  • Each refugio provides a bagged lunch. It was enough for me, I never ate any of the extra snack bars I brought on my own! It’s usually some kind of sandwich, and chocolate or sugary snack and fruit and/or cereal bars. Sometimes a juice as well. The best lunch was from Chile Nativo, who created the first day’s lunch for us to the long hike up to the Blue Towers. Second best was from Torres Central but don’t expect much. When you’re burning so many calories everything will taste good. Our sandwiches were either ham, turkey, or tuna. Breakfast was usually scrambled eggs with ham/cheese and cereal and yogurt and bread.

  • Pisco sours are delicious! The bars take credit card.

Pisco sour rewards for finishing a long hike

Pisco sour rewards for finishing a long hike

I loved the bar at Paine Grande as it had this amazing view of Los Cuernos.

IMAGE.JPG

Seeing a refugio towards the end of a hike was a great boost to finish. I remember on the fourth day, I was so winded but as soon as I saw the roof of Refugio Grey from half a mile away, energy surged back in my bones and I practically ran to finish the W trek the last 5-10 minutes of the hike.

Definitely book early if you want a bed at a refugio. My guess is most refugios only have about 30-50 beds.

IMAGE.JPG

November 2018: Planning for Patagonia

Planning for Patagonia is not logistically easy. It basically took me and my friends three days to get to Torres del Paine (pronounced Torres del “Pine-ay”), which resides in Chile, from NYC. Most people fly into Santiago, Chile to travel to Torres del Paine but we chose to go through Buenos Aires, Argentina as we wanted to end our trip visiting the vineyards of Mendoza.

This is the fourth time I attempted to plan this trip and I’m glad I waited this long. The first time I looked into going was more than 10 years ago and information on Torres del Paine is not as plentiful as it is today. The internet/communication infrastructure has probably improved over this period of time as well and a lot of things in place years ago are no longer. Four years ago I went to Argentina to visit Iguazu Falls (amazing, highly recommend waterfall lovers to go) and had to pay a $100 or so reciprocity fee (valid for 10 years) to get into the country. Well, apparently as of last year that’s no longer in place. In addition, the last time I was in Argentina, I had to exchange all my money on the ‘black market’ because the exchange rate was fixed as $1 USD = 8 pesos (on the black market you could get up to 12 or 14 pesos) and today, $1 USD = 35-38 pesos!

Anyway, planning a trip to Torres del Paine is no easy feat unless you have a lot of time on your hands. You need to register with the park and also make reservations in advance if you want to stay at the limited number of refugios (hostel lodges) in the park. From what I read on the internet, booking a bed or tent at the refugios was frustrating (payment won’t go through, people don’t respond, sold out, etc.) so early on my friends and I decided to bite the bullet and sign up with a tour guide instead to do all the bookings for us.

After a bunch of research, we decided to go with Swoop Patagonia. They have a flashy website and were very responsive and their itinerary worked out for us. However, as soon as we said yes to booking, they turned us over to Chile Nativo! So it turns out Swoop Patagonia is a 3rd party seller of tours and Chile Native is the local operator who actually takes you on the tour. It worked out anyway though as we LOVED Chile Nativo (and after speaking with them, I can see why they need Swoop—the agency has been around for over 15 years but is a small-run tour operator which has grown bigger in the last year and they just haven’t done as much marketing as they can be doing).

We found the price to be reasonable for our budget (we did the 5-day trek for $1695) though yes, if you planned this on your own, you’d be saving more than half. We just didn’t have the time to plan it all ourselves so to us, it was worth it. And no one in our group is an experienced camper or hiker so we felt more comfortable going with a guide in case something happened or someone got sick/injured but you don’t really need one. The trails on the W Trek are all well marked paths.

When I was doing my research for the tour, I read many mixed things about going either west to east or east to west on the W Trek (the other option is the O trek, which is much longer and you’ll see all of the park while the W hits the highlights). As Torres del Paine is known for its wind, most people suggested going west to east (to move along with the winds) but I am SUPER glad we went with Chile Nativo and did the route from east to west. I think this route is better because:

  • you’re moving along with the sun (if it is sunny—this will be incredibly helpful, hiking without the sun in your eyes)

  • we got the hardest part of the hike over on day 1, going up to the Blue Towers (which is what Torres del Paine means)

IMG_0499.JPG
This is literally what you can expect from hiking Torres del Paine. Our trip started at Refugio Las Torres and we stayed overnight in Los Cuernos, Paine Grande, and Grey. The first day of the hike to the Base of the Towers was the hardest (22 km rou…

This is literally what you can expect from hiking Torres del Paine. Our trip started at Refugio Las Torres and we stayed overnight in Los Cuernos, Paine Grande, and Grey. The first day of the hike to the Base of the Towers was the hardest (22 km roundtrip back to Refugio Las Torres) and took 8 hours.

In addition to planning all our accommodations, meals, and guides in Torres del Paine, Chile Nativo also booked our first and last night in Puerto Natales (the gateway into the park). We stayed at Hotel Vendaval, which was a wonderful stay, and you’re able to leave whatever luggage you’re NOT taking into the park here (which we found to be safe and we had locks on our luggage as well).

Getting to Torres del Paine from New York City

We traveled through four airports, two taxi rides, and two buses over a 72 hour period to get to Torres del Paine. We flew with Aerolineas Argentina (pretty decent airline, I have no complaints—besides the very first 5 minutes of my trip, the check ins were smooth, service was friendly, and had no issues traveling with this line). In summary, these were our travel logistics:

  • On Tuesday, Nov. 6, we took a 3:30 pm direct flight from JFK to EZE, the international airport in Buenos Aires, Argentina. The trip may have started off on the wrong foot had I not watched out for my luggage! I ended up bringing just two pieces—a carry-on size hiking backpack for the trek and a carry-on size suitcase that I checked in. Well, while the Aerolineas Argentina agent gave me my plane ticket at check in, I noticed he totally forgot about my checked-in bag! When I asked him about it, his eyes got wide and said “Oh, yes! Sorry about that!” and ticketed my luggage, stuck the slips on, and put it on the conveyor belt. Had I not watched/said anything, who knows if my luggage would’ve made it out! Probably not, since he didn’t even issue a luggage ticket until I asked! My other friend also had an issue with her luggage and bringing on her trekking poles. Mine were foldable and hidden but hers were bigger and sticking out and had metal tips and they had to recall her luggage (after she checked it in) to put the metal tips away. They wouldn’t let her pass security otherwise. Anyway, after the luggage issues, we otherwise had a smooth overnight flight and arrived in EZE by 4 am, and in November, Buenos Aires is two hours ahead of NYC.

  • By the time we got our luggage and through customs, it was 6 am. I was paranoid about getting money from the ATM (last time I was in Argentina my cards didn’t work at all!) so I exchanged U.S. dollars at Banco Nacional, a local Argentinian bank. The bank is located directly outside the luggage, to the right. ATMs may have a limit to how much you can withdraw every day so I withdrew $600 USD which was more than enough to get me through the two week trip (most places except taxi cabs take credit card). The exchange rate I got it for was AR 34.60 vs. the official rate at the time of 35-36 pesos so not much of a difference. And if you do use the ATM, you will probably pay additional fees there too.

  • We booked a car transfer with Taxi Ezeiza. I made the rsvp a few days beforehand online and they charged $35 USD for 4 people. They’re also located right outside the luggage terminal, at a big booth and if you make a rsvp your name will be on a sign at the desk. You can pay in dollars or pesos (or in credit card). We had rush hour traffic and it took just over an hour to get to AEP, which is the domestic airport in Buenos Aires.

  • From AEP, we took a 12:15 pm flight from Buenos Aires to El Calafate, Argentina. You can either fly to El Calafate to get to Puerto Natales (the last town before Torres del Paine) or to Punta Arenas, Chile (which is further south than Puerto Natales). Two of my friends told me there was NOTHING to see in Punta Arenas whereas in El Calafate you at least have the Perito Moreno Glacier so I’m glad we stuck to El Calafate. Also, if you plan to visit more of Argentina after Torres del Paine, it’s cheaper to fly within Argentina than to fly to Chile and then back to Argentina. We arrived in El Calafate by 3:30 pm and grabbed a taxi to pick up our bus tickets for the next day’s trip to Puerto Natales. The bus terminal is about 15 min. away from the airport and costs like $10 USD to get there by taxi. We had to pick up our tickets the day before because they needed to verify our passport info for the border crossing. The bus office (Cootra) closes at 4:30 pm so keep this in mind if you choose to use them and fly into El Calafate before then! We stayed overnight at Hostal Gnomos, which is a 5 min. walk from the bus station.

  • The next day: woke up early to catch the 7:30 am bus to Puerto Natales. We got to the bus station by 7 am though as we heard horror stories of buses leaving without people if they were not on time. The Cootra bus was quite nice and comfortable. It’s a double decker bus (you can reserve seats in advance) and there is a bathroom on board for the 5-6 hour drive. The driver didn’t really speak English though but we figured things out. By the time we got to the border crossing it was about noon and the whole process took an hour. On the Argentina side, they just stamp your passport. On the Chile side, they stamp your passport but they also scan your luggage (we had no problem bringing in snacks or food—I think someone got fruit in—but from what I heard it really depends on the mood of the officers!). The Chile passport security check has bathrooms which was much needed after the long drive. The Argentina side does not, and going on the bus is not really fun. So after security check it was another 45 minutes to Puerto Natales. When we arrived, we grabbed a taxi for 2000 Chilean pesos to Hotel Vendaval (like $5 USD). I had gotten Chilean pesos before the trip at Chase Bank (they didn’t offer Argentian pesos though and all I took was $60 USD equivalent in Chilean pesos which was more than enough. I never needed Chilean pesos on the W trek, just for the taxis. We ended up using the money for dinners in town though but they take credit cards). Checked into Hotel Vendaval.

  • In the evening, we had our briefing at the office of Chile Nativo (literally a 2 min. walk from the hotel) and met our two tour guides, the rest of our tour group (10 people in total!) and got the details of the trip.

  • The next day: got picked up at 6:30 am on Friday morning, November 9, 2018 for the hiking trip of a lifetime!!!

Other Info

Other resources that really helped me for the trip:

  • This website someone recommended on Trip Advisor was amazingly helpful to check out the weather forecast in Torres del Paine: www.mountain-forecast.com. Just be sure to pick the lowest altitude and convert it to Fahrenheit if needed. I checked the forecast every day for a week before arrival and it was 90% spot on in predicting the weather we would be having in an unpredictable place.

  • REI. I love this store. I know I’m late to the game but I grew up as a city slicker. I never grew up camping or being in the outdoors! But REI and the people who work there were wonderful resources for me in terms of what gear I needed for this trip. I got my backpack, trekking poles, jackets, windproof pants, blister bandaids, everything here. I’ll do a post later on the gear I got.

January 2018 Trip Report: Cancun

It breaks my heart to see all the violent news coming out of Cancun these past few months. I've been to the Cancun region the most out of any other trip, 5x in the past 10 years. Most recently I went over Martin Luther King, Jr. Day weekend this past January and as usual I had an amazing time. If you haven't been yet, below are some of my thoughts and observations over the years:

Pool at the Westin Lagunamar

Pool at the Westin Lagunamar

The Cancun Area

  • Cancun, Playa del Carmen, and Tulum are all accessible from the Cancun airport. Cancun is the closest (20 min away), while Playa del Carmen can be anywhere from 45 min to an hour by taxi, and Tulum is about 90 minutes away by taxi. I haven’t been to Tulum yet, but it’s probably next on any future trips down there. Tulum is more low key/casual—the hotels there are more boutique, or bed and breakfast-style. It won’t be like grand resorts or anything and not as lively. From what I hear, most people go there for the more laid back/wellness-type vacations (ie yoga/hipsters, etc). Playa del Carmen and Cancun is much more family friendly. Cancun is super commercialized though, and I prefer Playa del Carmen more in terms of the downtown scene and the food (cheaper, more local Mexican food). Cancun is much more touristy. Both areas are pretty safe to visit, but you do have to watch out for scams and don’t go off the commercialized streets (ie don’t go anywhere that looks empty).
  • If you do go, they take both US Dollars and pesos, but you will get a better rate if you exchange dollars for pesos. So for example when I was just there, a taxi ride was 130 pesos but I didn’t have enough pesos on me and I knew the conversion was $8 USD but the driver charged me $10. Some charged $8 but others will say 10. It’s not metered, they’re flat rates so you have to ask before you get in how much it costs. I know I could’ve argued but given that I know they don’t make much I didn’t (but I was annoyed based on principle). Right now the exchange rate is about $1USD to 20 pesos but the hotels will exchange it for 18 pesos, which is not bad. You can def get a better rate at the ATM or whatever but at the end of the day I only spent like $60 USD in pesos btwn me and my friend (we were super lazy and took taxis to dinner the whole 4 days we were there). We didn’t have a problem using credit cards for food, just for taxis and tips you may need pesos for (and I also brought small $5 USD bills for tips).
    • I went to Cancun because SPG (the hotel rewards) sent me this amaaaaaaazing deal for the Westin Lagunamar. The deal was $320 for 4 nights, total. So I split w a friend, and we stayed there and the resort is fantastic. However, the reason why I got the deal was because they tried to sell me on a timeshare when I was there (I had to sit thru a 90 min presentation) but honestly, it was worth it cuz we paid so little for a great place and I got additional points for sitting thru the presentation (and I stood my ground and said no to the timeshare….they can’t hustle a hustler! Haha). I like going to Cancun though because there are SO many resorts and so I find the experience to always be different. You should research which resort to stay at though, as the beach property does depend on where you stay. The beachfront at the Westin was really clean and gorgeous. The neighbor resorts were also as nice, but not as nice as the Westin. But, not bad either. Other places I’ve stayed at and liked were:
      • Beloved Playa Mujeres: https://belovedhotels.com/; I stayed here for a friend’s wedding maybe 3 years ago. Nice resort, and all their water activities were free too (ie paddleboarding). I remember the ocean here was calmer too. Just FYI the ocean in Cancun is super rough, so you don’t really go in the water unless you’re a good swimmer. I think the water by Playa del Carmen is a lot calmer than Cancun. Cancun also tends to be windier as well. We were lucky and have two great warm sunny days, but the other two days were a bit chillier and windy (but still good enough to sit outside).
      • Royal Haciendas: https://royalreservations.com/resorts/the-royal-haciendas; I stayed here a few years ago for a friend’s bachelorette party and this was soooo nice too. Excellent pools and rooms (they have kitchens). This is closer to downtown Playa del Carmen as well I think.
      • Hyatt Playa del Carmen: https://playadelcarmen.grand.hyatt.com/en/hotel/home.html; I stayed here two years ago in Feb. I actually went solo and I had a great time. The beach was not as nice, but the pool was great and they have an amazing spa where I spent a whole afternoon in. It is also right next to downtown so no taxi required to go into downtown, unlike other resorts which are further away. But, may not be good option cuz it’s kind of clubby (they play loud music for the younger people to hang out to).
Sunrise from my hotel room this past January

Sunrise from my hotel room this past January

  • Other things to do in Cancun: There are tons of activities and tours but honestly I like to go and just chill at the resort. The Mayan ruins sound interesting but in my opinion are not really. Ha. They used to allow people to climb them but they don’t anymore, and the bus ride to get there is long. Isla de Mujeres is also touted as something to do but I also think you can skip it unless you just want to get out of the resort for a day. You take a ferry there and spend an afternoon walking around, but it’s mostly the same shops (touristy) that you’ll find downtown. You can do snorkeling etc but it’s not that great.
  • They do have some water amusement parks—I’ve been wanting to check those out but haven’t. But they seem fun/different than the ones in the US. 
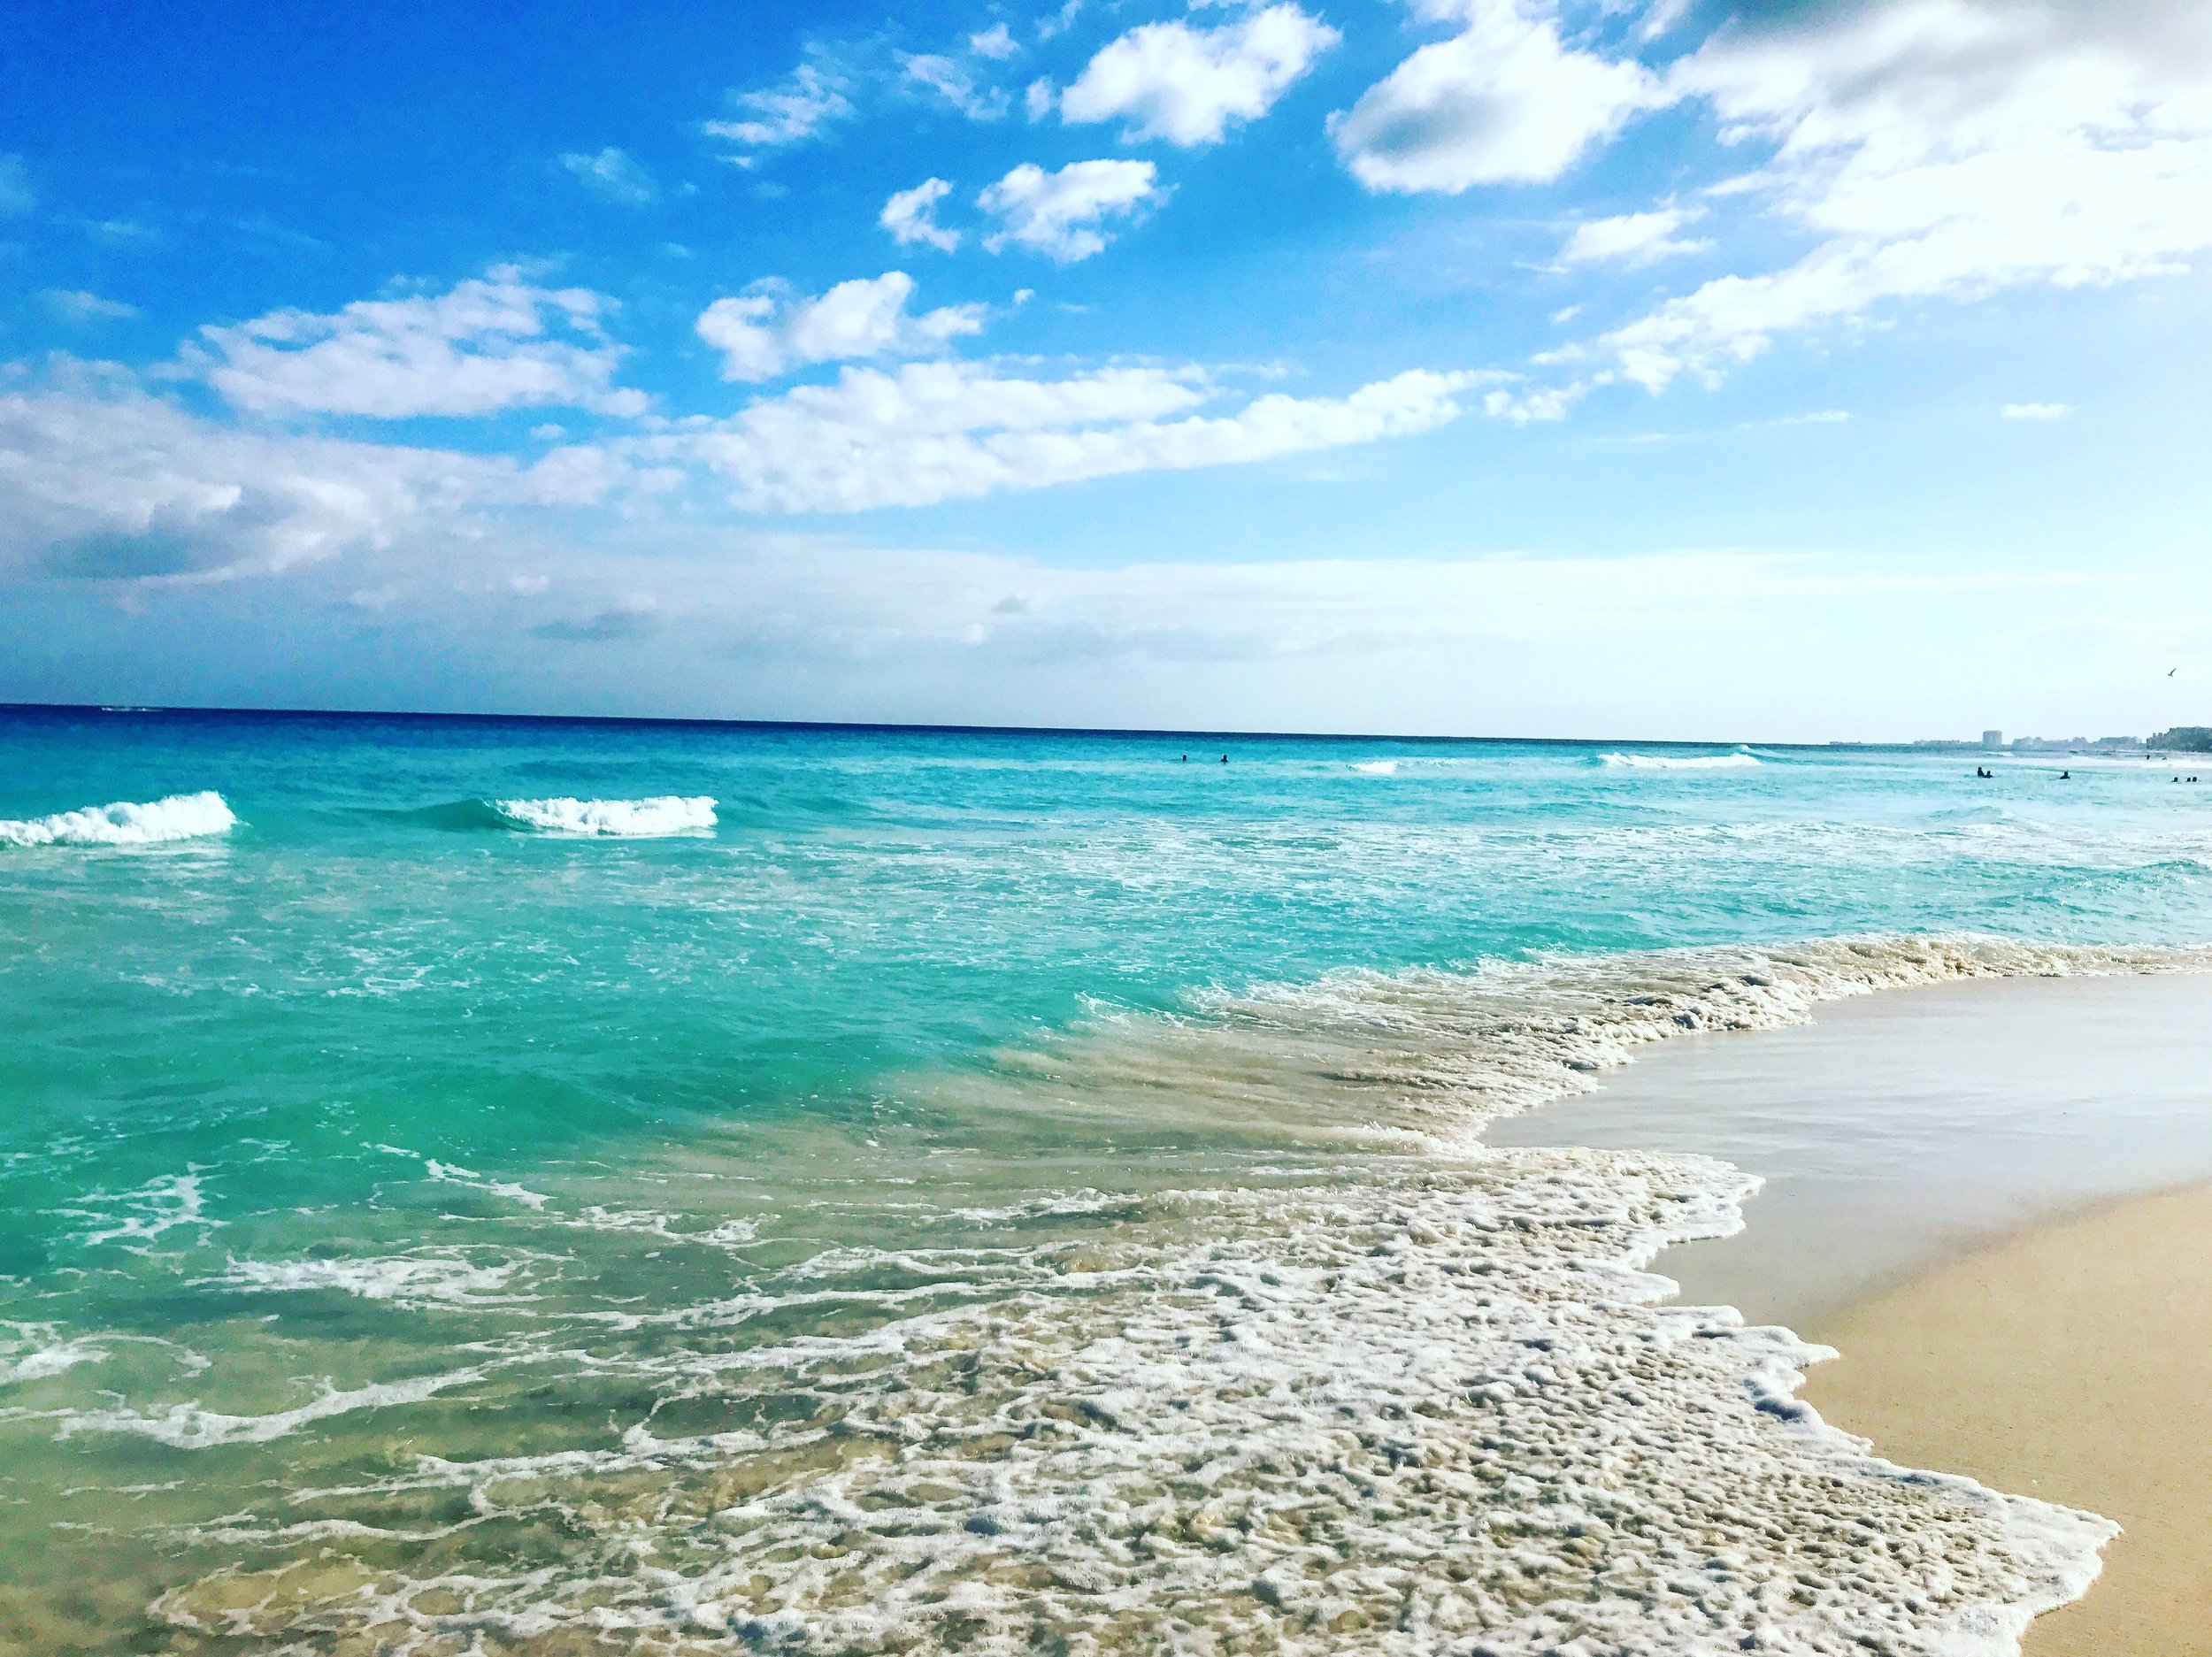
Life's a beach

Life's a beach

  • If you do go, def arrange your hotel transportation in advance. Some hotels provide it, others don’t. If hotels provide it they will still charge you though and it’s not always the best rate. I used Canada Transfers for Cancun and it was great, so easy and great rates: https://www.canadatransfers.com/

We paid $53 round trip for two people, and it’s a private transfer so you are not stuck waiting for other people. I made the rsvp online and printed the vouchers and paid in USD cash in person when they picked us up. Returning to the airport they were also right on time. I highly recommend using them (and they give you water bottles when you arrive—do not drink tap water in Mexico, ever!).

  • Exiting the Cancun airport is overwhelming. People will try to get your attention and sell you something (anything, a tour, a taxi, etc). When you exit, just leave the terminal, don’t stop to talk to anyone, and just look for the guy wearing the Canada transfer shirt and holding up a sign w your name on it (it will have other names on it as well)
  • Do NOT throw away the bottom portion of the Mexico document you have to sign when you pass thru customs. They take the top part of the doc, you keep the bottom w your passport and hand it in when you depart at the airport. My friend wasn’t paying attention and threw hers away and had to pay $32 USD for a new one to exit.
The reason why I always return

The reason why I always return

Viva Mexico!

Viva Mexico!